
- May 28, 2019
- Posted by: SouTech Team
- Category: Blog, Development, Web Development Training, Website Design Service Abuja, Website Design Training, Website Hosting, Wordpress Website Design Training
A lot of people has been asking me lately how they can install WordPress locally, either in their LAMP, WAMP or my own preferred XAMPP. Well though install WordPress on a local server seems harder than working with WordPress itself, I can assure you it’s pretty much easy as well. I already have an article on how to install WordPress via Cpanel (if you missed it, click here to read it), so this article will focus on installing WordPress via local server (i.e XAMPP).
Wait, What is LAMP or XAMPP?
LAMP, WAMP, MAMP or XAMPP are local server software. Install it into your computer makes you computer to act as a web server only that it’s locally accessed on your computer without an internet connection. With a local server, you can build websites and applications, run and test them like it would on a live web server. Websites/Applications built on a local server can only be accessed on the computer it resides, except you are connected to a (local area network) LAN, where other computers in the network can access those websites and applications login onto your computer’s IP address.
Before we begin installing WordPress, you should a local server install, I will be using XAMPP in this tutorial. If you want to install XAMPP, click here to follow this guide.
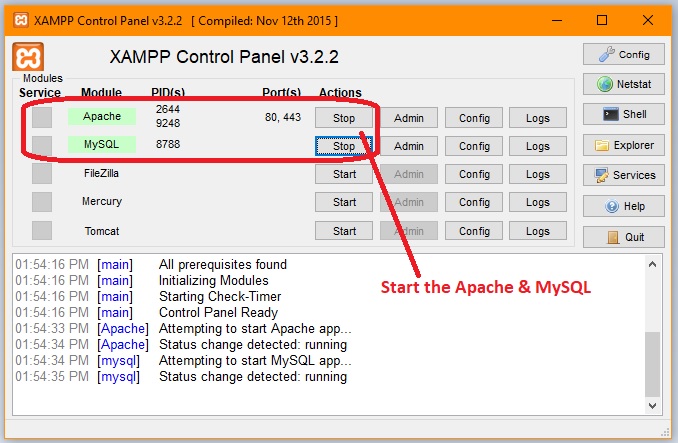
Make sure your XAMPP control panel is up and “Apache” and “MySQL” are both running.
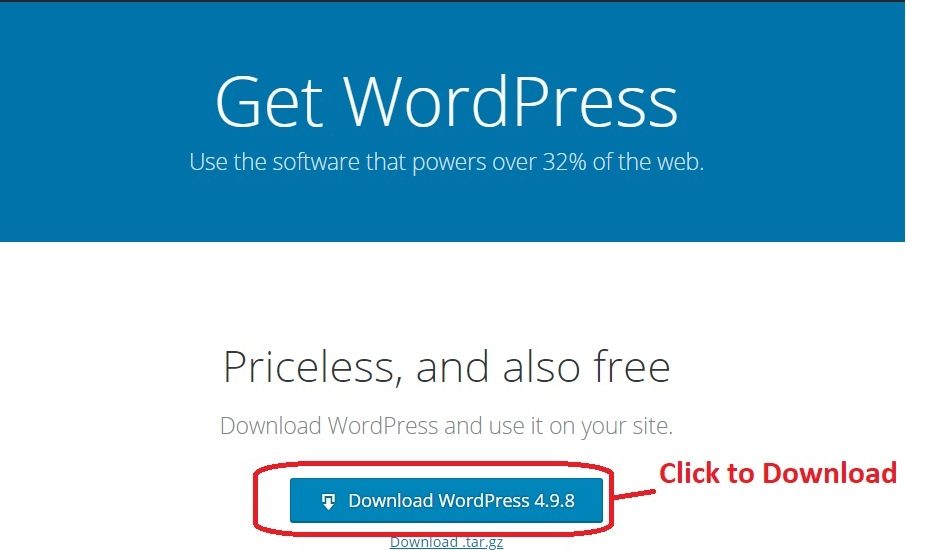
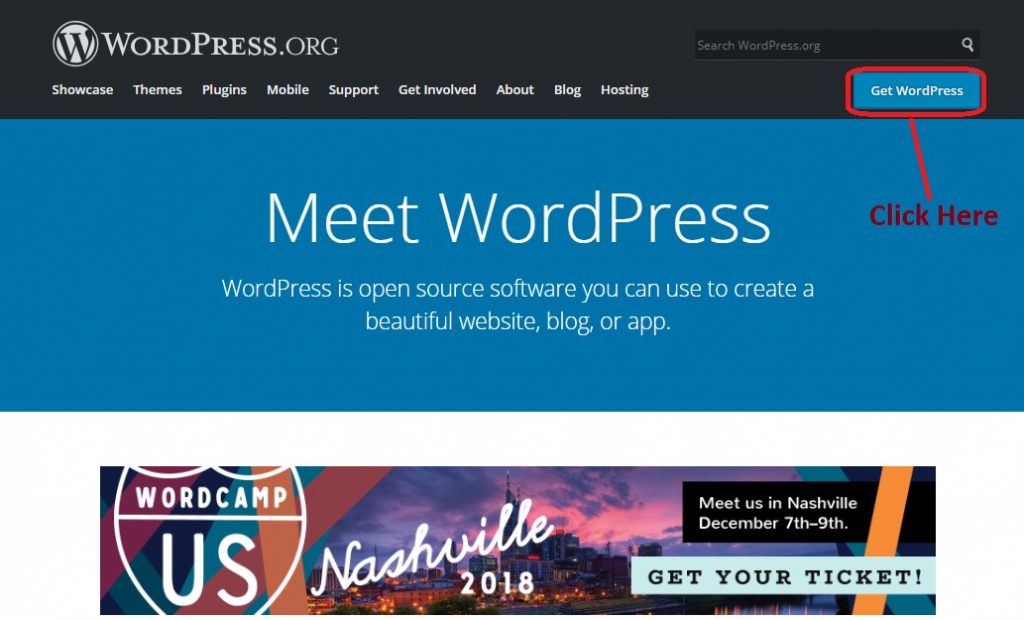
Visit https://wordpress.org and click the “Get WordPress” button, click “download WordPress x.x.x. WordPress will be downloaded in a zip file.
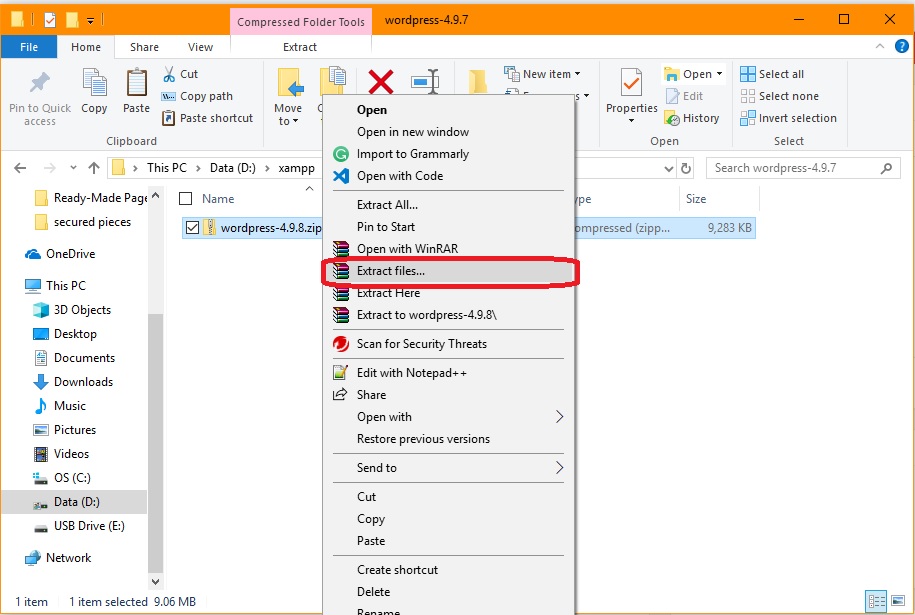
Extract the zip file and copy the “WordPress” folder from the extracted folder.
The content of this folder includes 3 additional folders and files that makeup 19 items. As you finish installing WordPress, the items in this folder will increase to 21 items.
Copy the “WordPress” folder and paste it inside the XAMPP >>Htdocs folder.
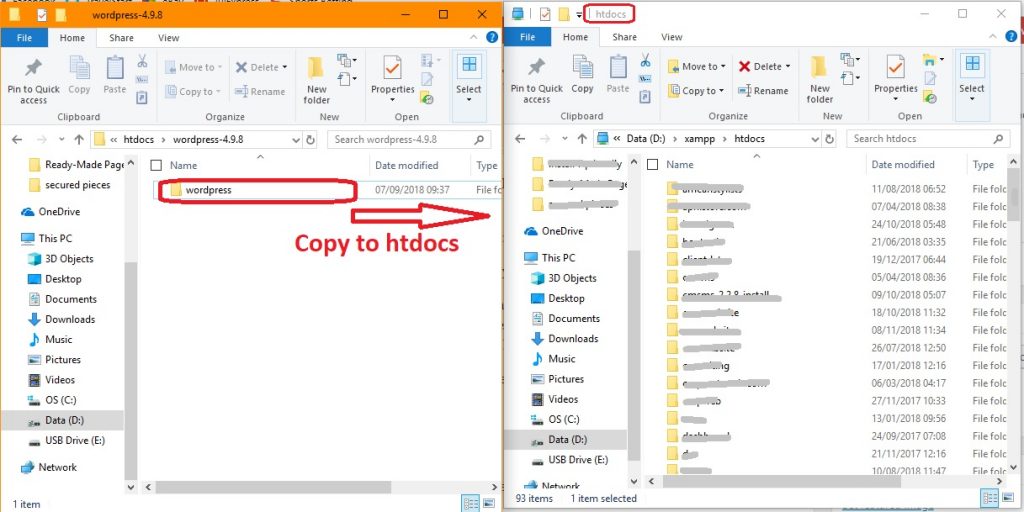
The XAMPP folder can be located inside your C:/ drive or any partition that you have chosen to install it into.
Tips: Another way to access the XAMPP folder is by clicking the “explorer” button on the XAMPP control panel.
The XAMPP folder will pop up, locate the htdocs folder. In this folder is where all your websites will reside. Each website or application you want to build should have its own folder inside the “htdocs” folder.
In your htdocs folder, rename the WordPress folder to any desired name without space, this will save as a domain name.
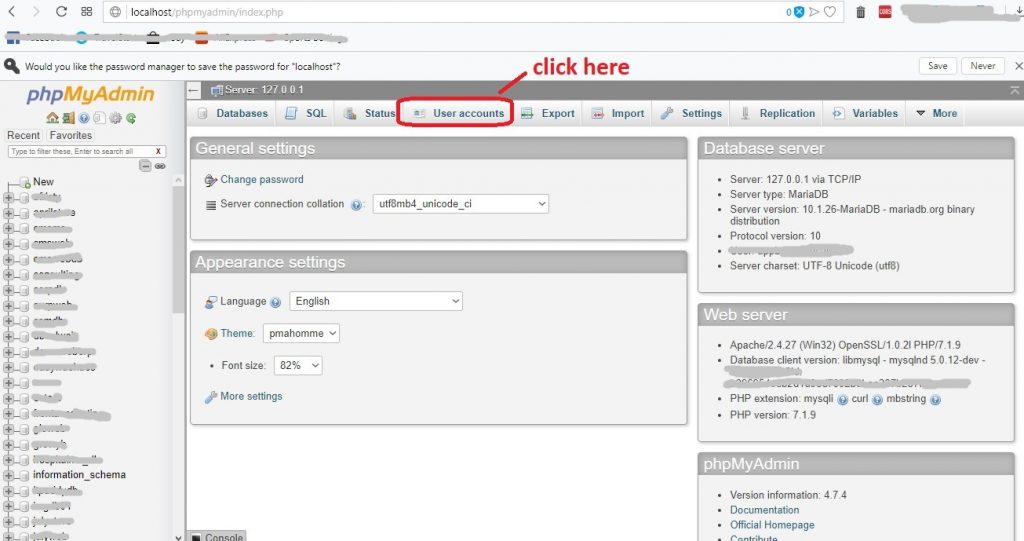
Open your browser and visit http://localhost/phpmyadmin : this is the database application interface that comes with XAMPP.
If you have just installed XAMPP for the first time, then we need to create a database username and password.
To create a XAMPP username and password click “user accounts”
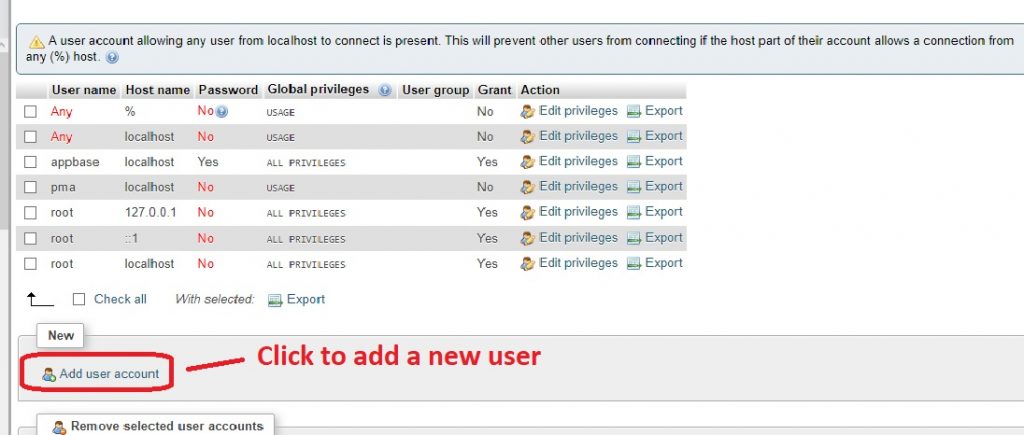
Click “add user account”
User name: Choose a username
Host name: Select local from the drop
Password: enter the desired password
Retype password: re-enter password as above
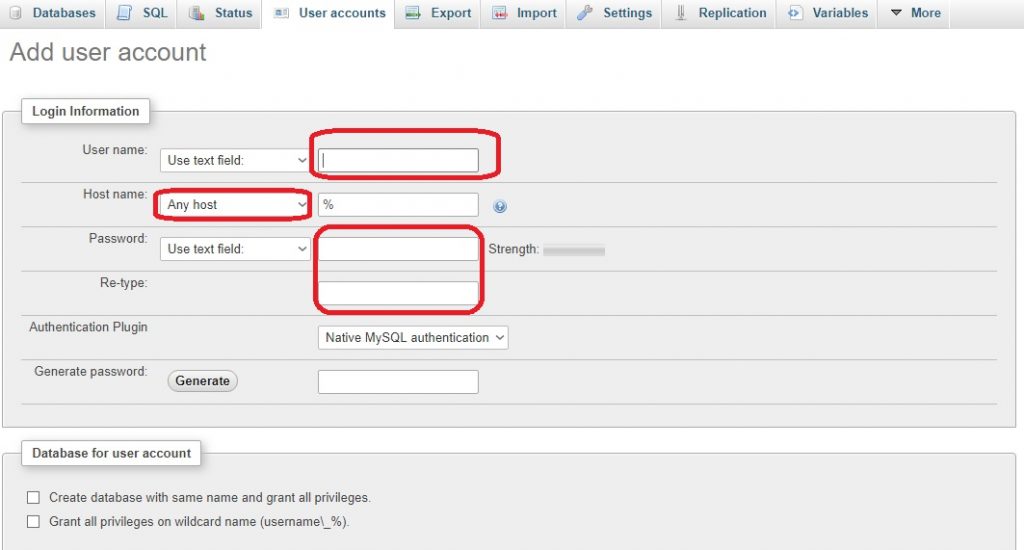
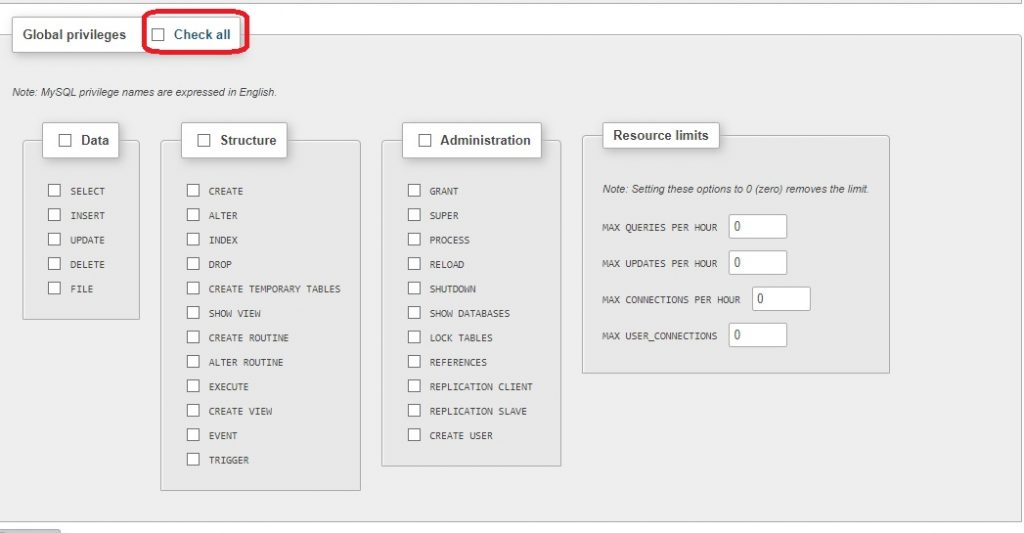
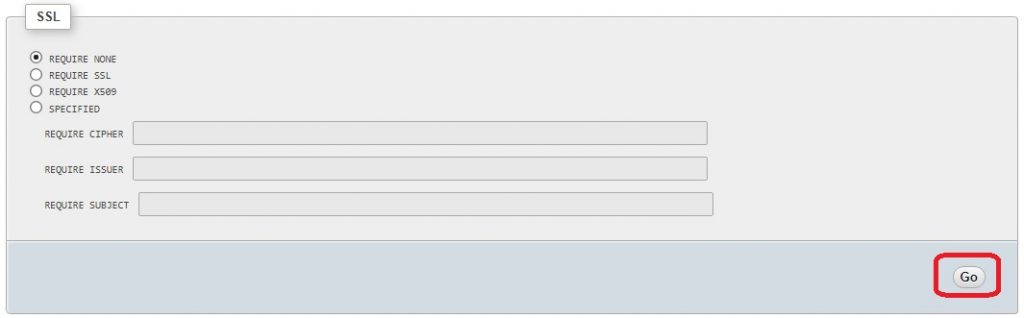
In global privileges, Check all then scroll down and click the “go” button.
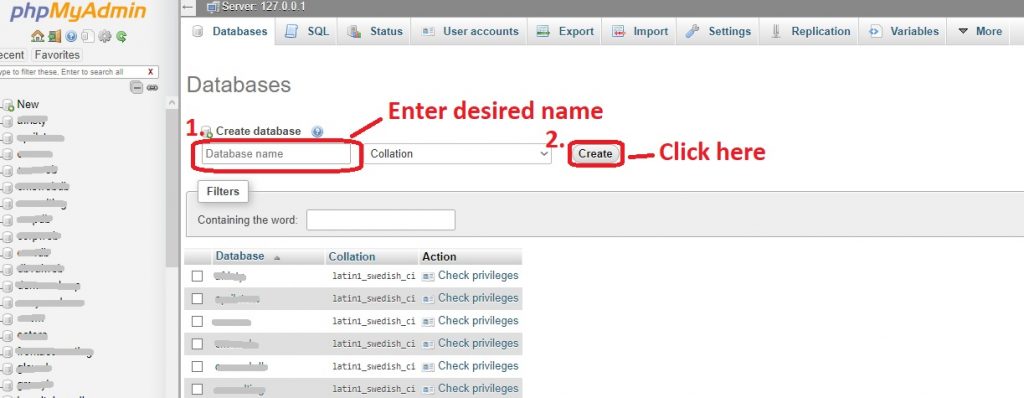
Now that we have successfully created a username and password, let us create a database.
To create a new database; from the “left tab”, you will see a list of other databases including default databases created by XAMPP. simply click “new” from the list and enter your desired “database name” and click “create”.
Now that we have a database, let’s install WordPress.
Open your browser and access your website by going to http://localhost/name-of-folder-created.
You should be seeing a “welcome to WordPress…”
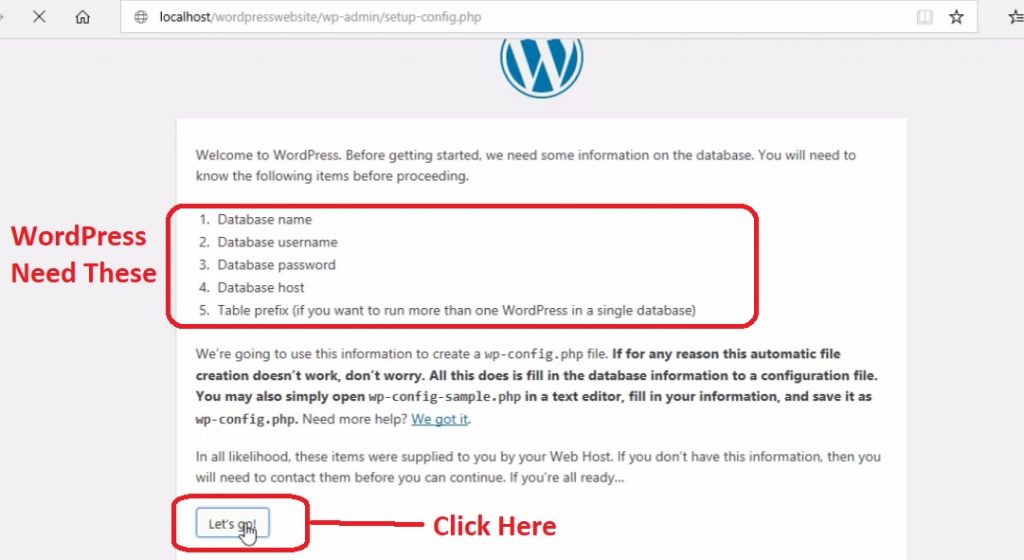
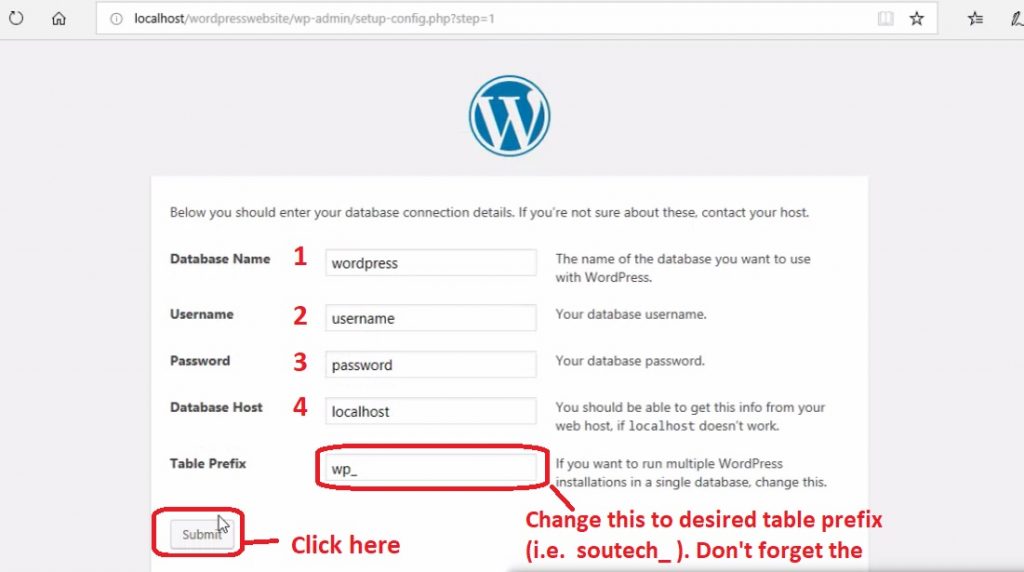
You will need to supply WordPress with:
- Database name: (the database name you have just created)
- Database username: (The username of the database we created earlier)
- Database password: (password for the username)
- Database host: (use “local” without the quotes)
- Table prefix: (change this from wp_ to something else, or add something else to it – ie. if my website is soutechventures.com, I would use somthing like soutechwp_ or sv_)
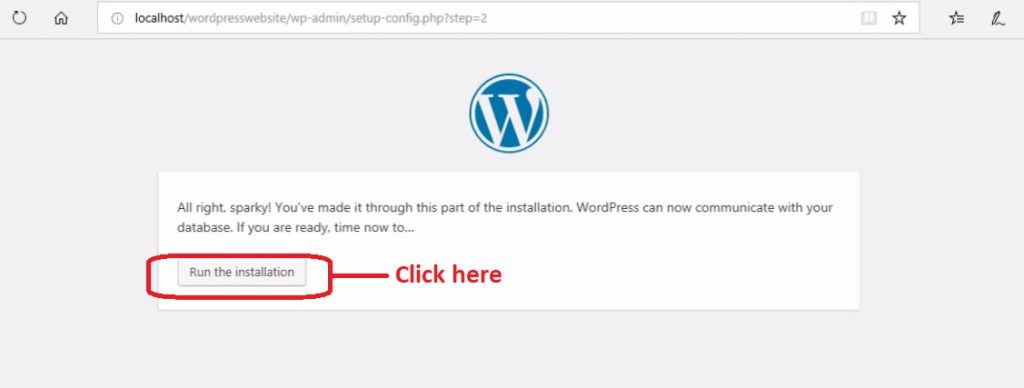
If you have got everything correctly, you should see “alright sparky …” click the “run the installation” button.
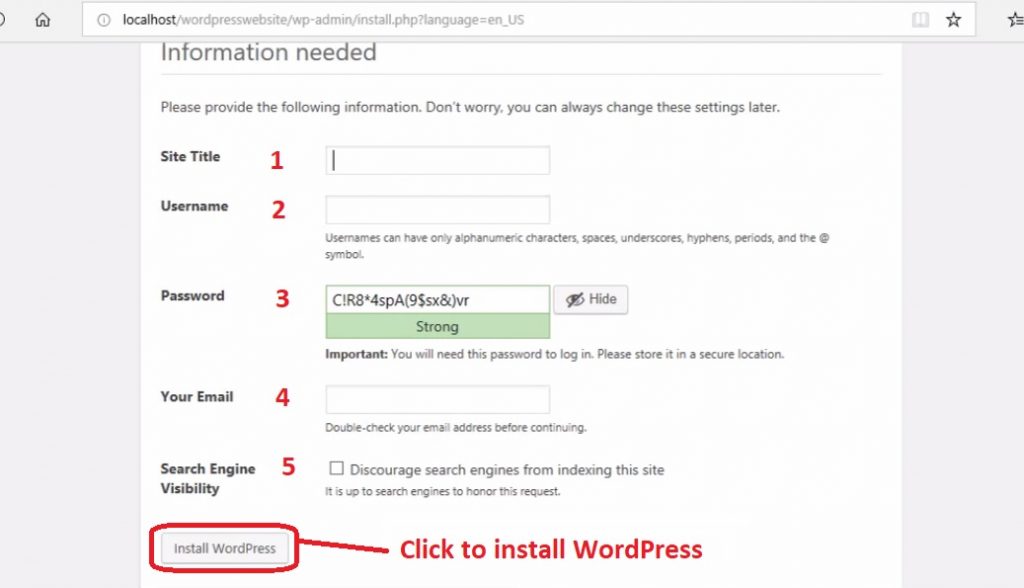
The next page is where you enter all information as regards your website.
- The name of your website:
- Username and password of the administrator
- Enter desired admin email address which should be used for account recovery.
- Search engine visibility: leave this option unchecked, except if you are building an in-house application or website that you would not want a search engine to index.
Click the “install WordPress” button.
You have successfully, install WordPress on your local server.
Next, is to start installing theme, plugins and creating pages.
The Soutech Website Design training covers a lot about website design, including e-commerce websites. Students are expected to build a corporate website and an e-commerce web store upon completion of the training. Kindly click here to learn more.
Click to start learning while you earn and grow…

Related posts:
 Local Web Development via a server: Learn how to start developing websites- SOUTECH
 8 Important Plugins to Install for Your WordPress Website
 WordPress Subdomain | How To Install WordPress On Subdomain? SOUTECH Hosting
 Building your website with WordPress – Differences Between www. wordpress.org and www.wordpress.com
 Web Application Security (15 Simple Tricks to Secure Your WordPress Website in 2018)