
- October 14, 2019
- Posted by: SouTech Team
- Category: Blog, CEH, CISSP, Cyber-security and Ethical Hacking Training, Softwares

Kali is a free Debian-based Linux distribution intended for penetration testing. The first version of Kali Linux was released in 2013 as the rebuild of BackTrack Linux – a previous well-known distribution for security auditing and penetration testing. Some tools that were duplicated or provided similar functionality in BackTrack Linux were removed in Kali Linux. There are more than 600 penetration testing tools included in Kali Linux that can be run as Live DVD without installation as well as be installed on a computer as a desktop OS. Sometimes you may not have the ability to dedicate the entire computer to running Kali Linux from neither Live DVD nor your internal hard disk as the installed OS. In this case, hardware virtualization technologies can help you – you can install Kali Linux on a VMware VM running on your desktop, laptop or server. As a result, you can use your physical machine for the usual tasks while simultaneously running a virtual machine with Kali Linux for penetration testing and security auditing of your networks, software, etc. This blog post explores the installation process of Kali Linux on a VMware virtual machine and configuration of a Wi-Fi network adapter.
Downloading the ISO Image
First, open the Kali download page in your browser and select the distribution that can best meet your needs. The installation images are provided in the ISO format for 32bit, 64bit and ARM architecture. You can also select the build with your favorite graphics desktop environment among Gnome, KDE, Xfce, Mate, etc. For the sake of simplicity and consistency in this blog post, let’s download Kali Linux Xfce 64 Bit via HTTP. When the ISO file is downloaded, check the sha256sum to verify the data integrity and ensure that the file is not corrupted.
Creating a New VMware VM
Let’s explore how to install Kali Linux on a VM of the VMware Workstation format due to portability-related reasons – you can install VMware Workstation on a laptop, deploy a virtual machine with Kali Linux, and use this laptop for auditing wireless networks, for example. Kali Linux can also be installed on a VMware ESXi host if needed – the installation process is quite similar. In the current example, VMware Workstation 15 will be used to show the installation and configuration of Kali Linux.
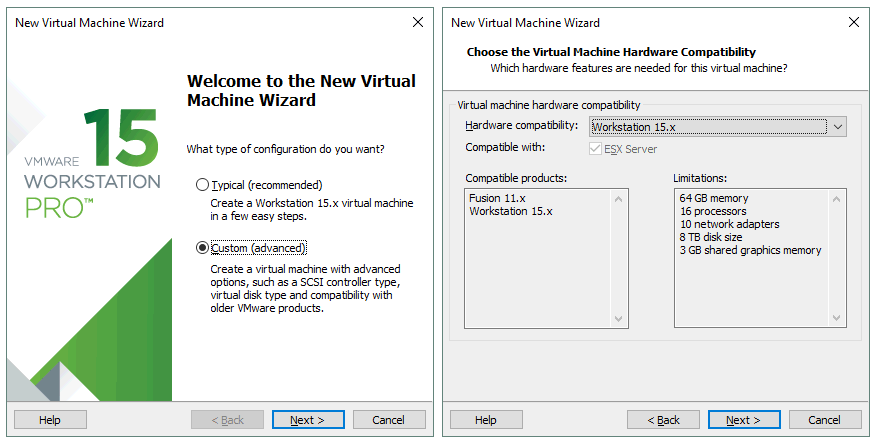
Click File > New virtual machine to open the New Virtual Machine Wizard. Select Custom.
Choose the virtual machine hardware compatibility. If you are not planning to migrate a VM to older versions of VMware Workstation or ESXi servers, select the Workstation 15.x format. In this example the Workstation 14.x format should be selected for better compatibility in case of possible migration.
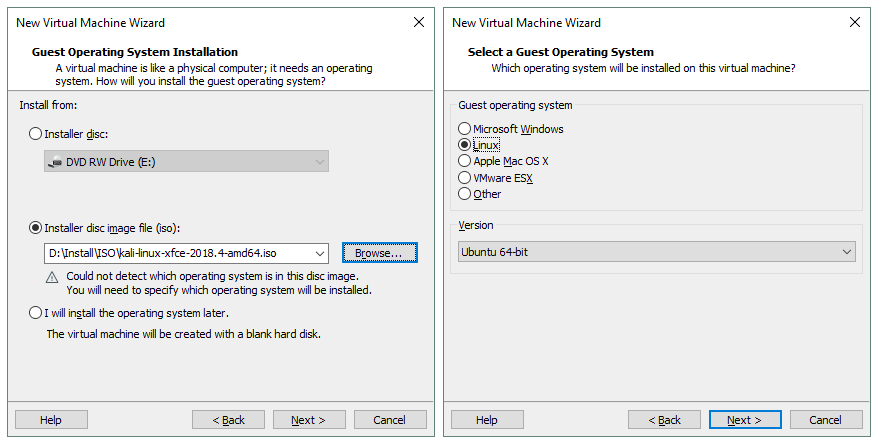
 Select the installer disk image file for guest operating system installation. In this case the downloaded ISO image saved to D:\Install\ISO\kali-linux-xfce-2018.4-amd64.iso should be selected.
Select a guest operating system (OS). Linux Ubuntu 64-bit must be selected for our purposes.
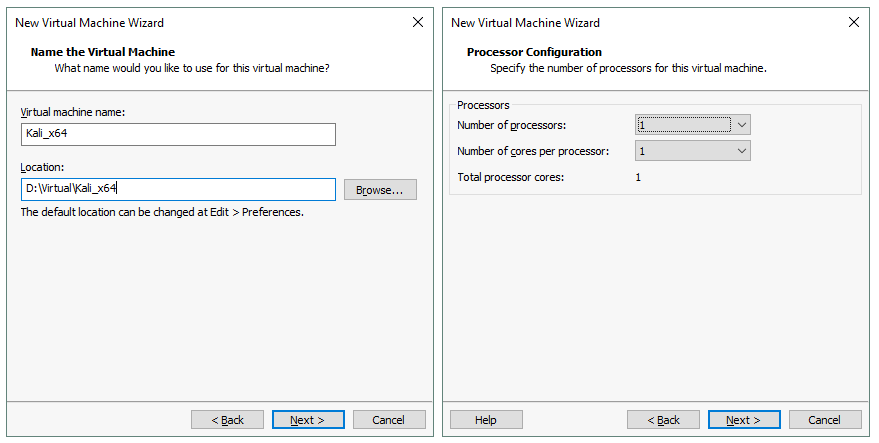
 Specify the VM name and location. In the current example, the VM name is Kali_x64 and the VM directory is D:\Virtual\Kali_x64.
Processor configuration. Specify the number of processors and the number of cores per processor for this virtual machine. Using 1 CPU is enough for Kali Linux.
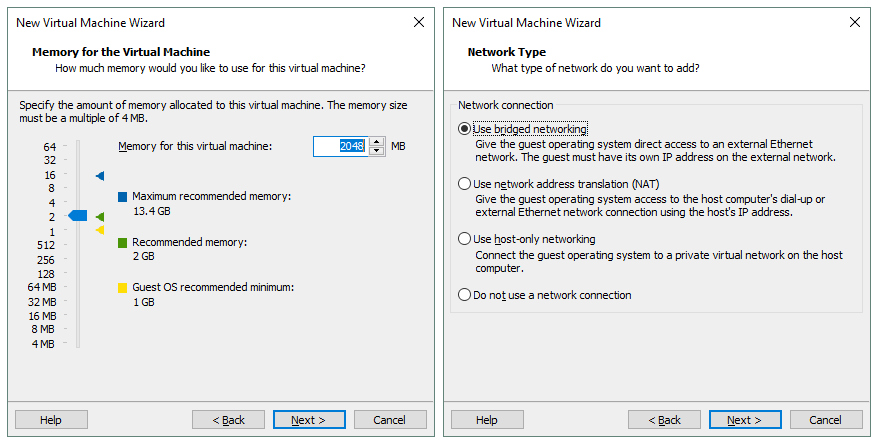
Set memory for the virtual machine. Kali Linux is not a resource-hungry operating system. 2 GB of memory should be more than enough for this VM.
Configure a network type for the VM. Select the Use bridged networking option.
 Select the SCSI controller that you will use for connecting a virtual disk to a VM. You can leave the default value as is and click Next to continue.
Select a disk type. You can leave the default recommended value (SCSI).
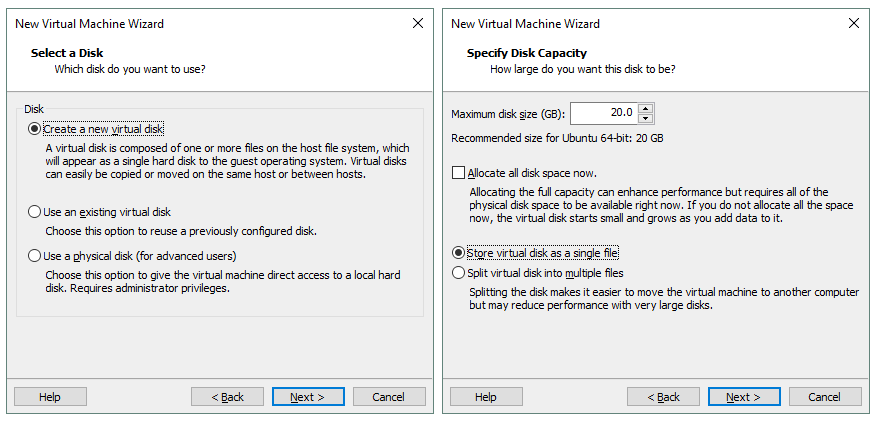
Select a disk. Click Create a new virtual disk and then click Next.
Specify disk capacity. 20 GB should be enough for the operating system. Select Store virtual disk as a single file if there are no limitations of your file system (such as 4 GB limit of file size for FAT32). Don’t check the box Allocate all disk space now if you don’t want the disk to consume all provisioned disk space now.
 Specify where you want to store the virtual disk file. In this example, the file path is D:\Virtual\Kali_x64\Kali_x64.vmdk.
Now everything is ready to create a virtual machine. Check the VM settings, customize hardware if necessary, and click Finish to create a VM.

Deploying Kali Linux on VMware VM
Installing Kali Linux is not difficult, as all installation steps are supplied with useful tips and comments. Let’s review the installation process step by step:
Installing the Operating System
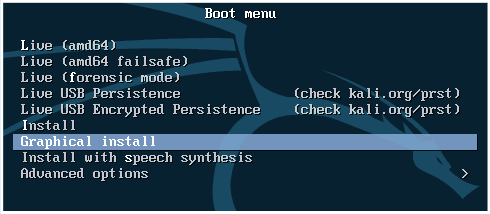
Once you have created a new VM, power on that VM and boot from the ISO image to start Kali installation. When a VM is loaded from the ISO image, you can see a boot menu that allows you to boot from the installation media in a live DVD mode, install the OS in a text mode (you get only a console interface without graphical user interface (GUI) after installation), and install the OS in graphical mode. Select Graphical install from the boot menu and press Enter.
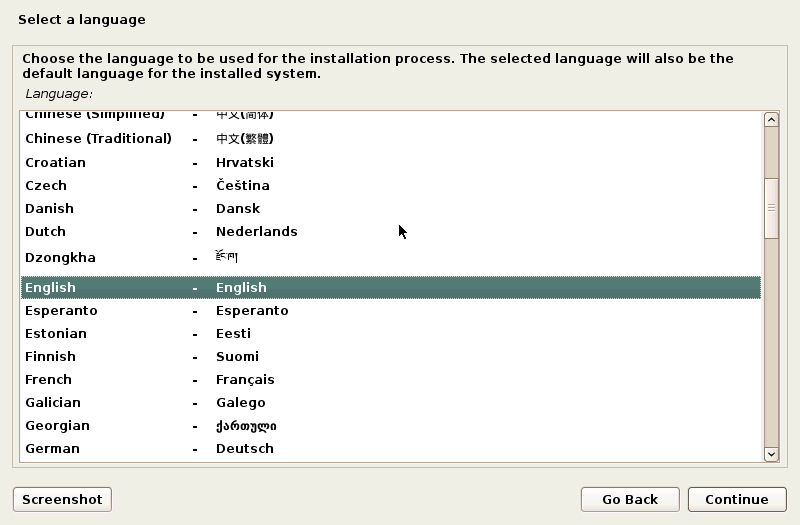
The graphical installation mode looks like a wizard with multiple configuration screens.
Select a language.
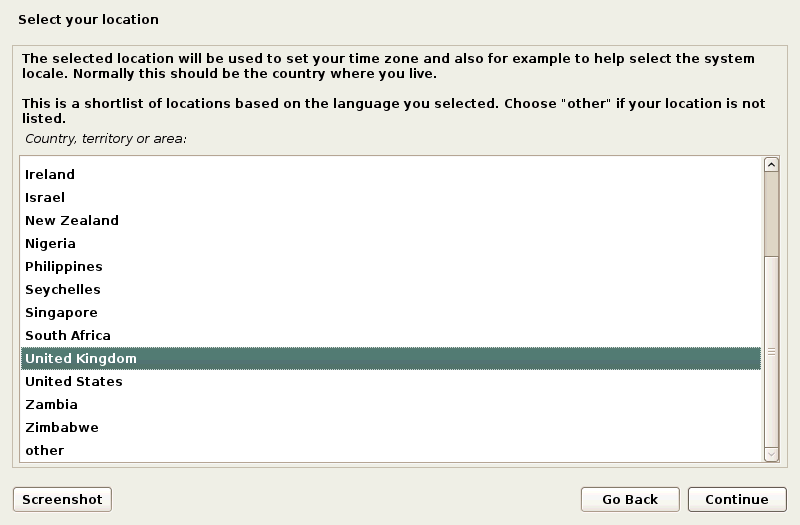
Select your location.
 Configure a keyboard.

Enter the hostname for this system, for example, k-linux.

Set the domain name, for example, domain.net.

WANT TO GET A DISCOUNT FOR ANY OF THE IT COURSES?
Like and Share our Facebook Page to 5 Friends and you qualify for a discount and free Entrepreneurship Biz Start Up Mobile App and eBook.
https://www.facebook.com/soutechventures AND
https://www.facebook.com/pg/soutechventures/reviews/
SMS Name,Location,Interested with course(see below) of choice to 08034121380
Professional Web Design, Cybersecurity, Hacking, Networking, Kali Linux, Mobile App Development, Project Management, Professional Digital Marketing, Business Analysis, Microsoft Power BI, Python for Data Science, PHP Software Development, IBM SPSS Research and Statistical Analysis, Excel for Business, Solar and Inverter Design and Installation and so many others….
====================
Set up the password for root user. Note that in some distributions of Kali Linux “toor” is the default password for the root user.

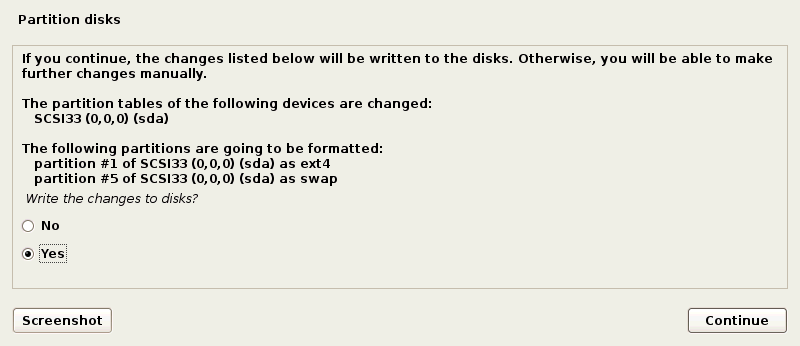
Select the partitioning method for your disks. If you want to create a custom partitioning table, select Manual. Selecting Guided – use entire disk should be enough for the first time.

Select your virtual disk to be partitioned.

Select All files in one partition.

Select Finish partitioning and write changes to disk.

Click Yes to confirm creation of a new empty partition table on the virtual disk for writing changes to disk.
The installation process starts after disk partitioning. Wait until the system installation is finished.
Configure the package manager. Select Yes to use a network mirror.

If you don’t have an HTTP proxy to access the outside networks, leave the field empty and click Continue.

Install the GRUB boot loader on a hard disk – click Yes to do this.

Define the device for boot loader installation. We use /dev/sda.

Installation is complete. After rebooting your VM, enter root as the user name and enter the password you have specified during OS installation.
Installing VMware Tools on Kali Linux VMware VM
Now you have to install VMware Tools, i.e. a set of useful drivers and utilities that improves VM performance and interaction between host and guest (shared clipboard, drag & drop files, USB devices pass-through, etc.).
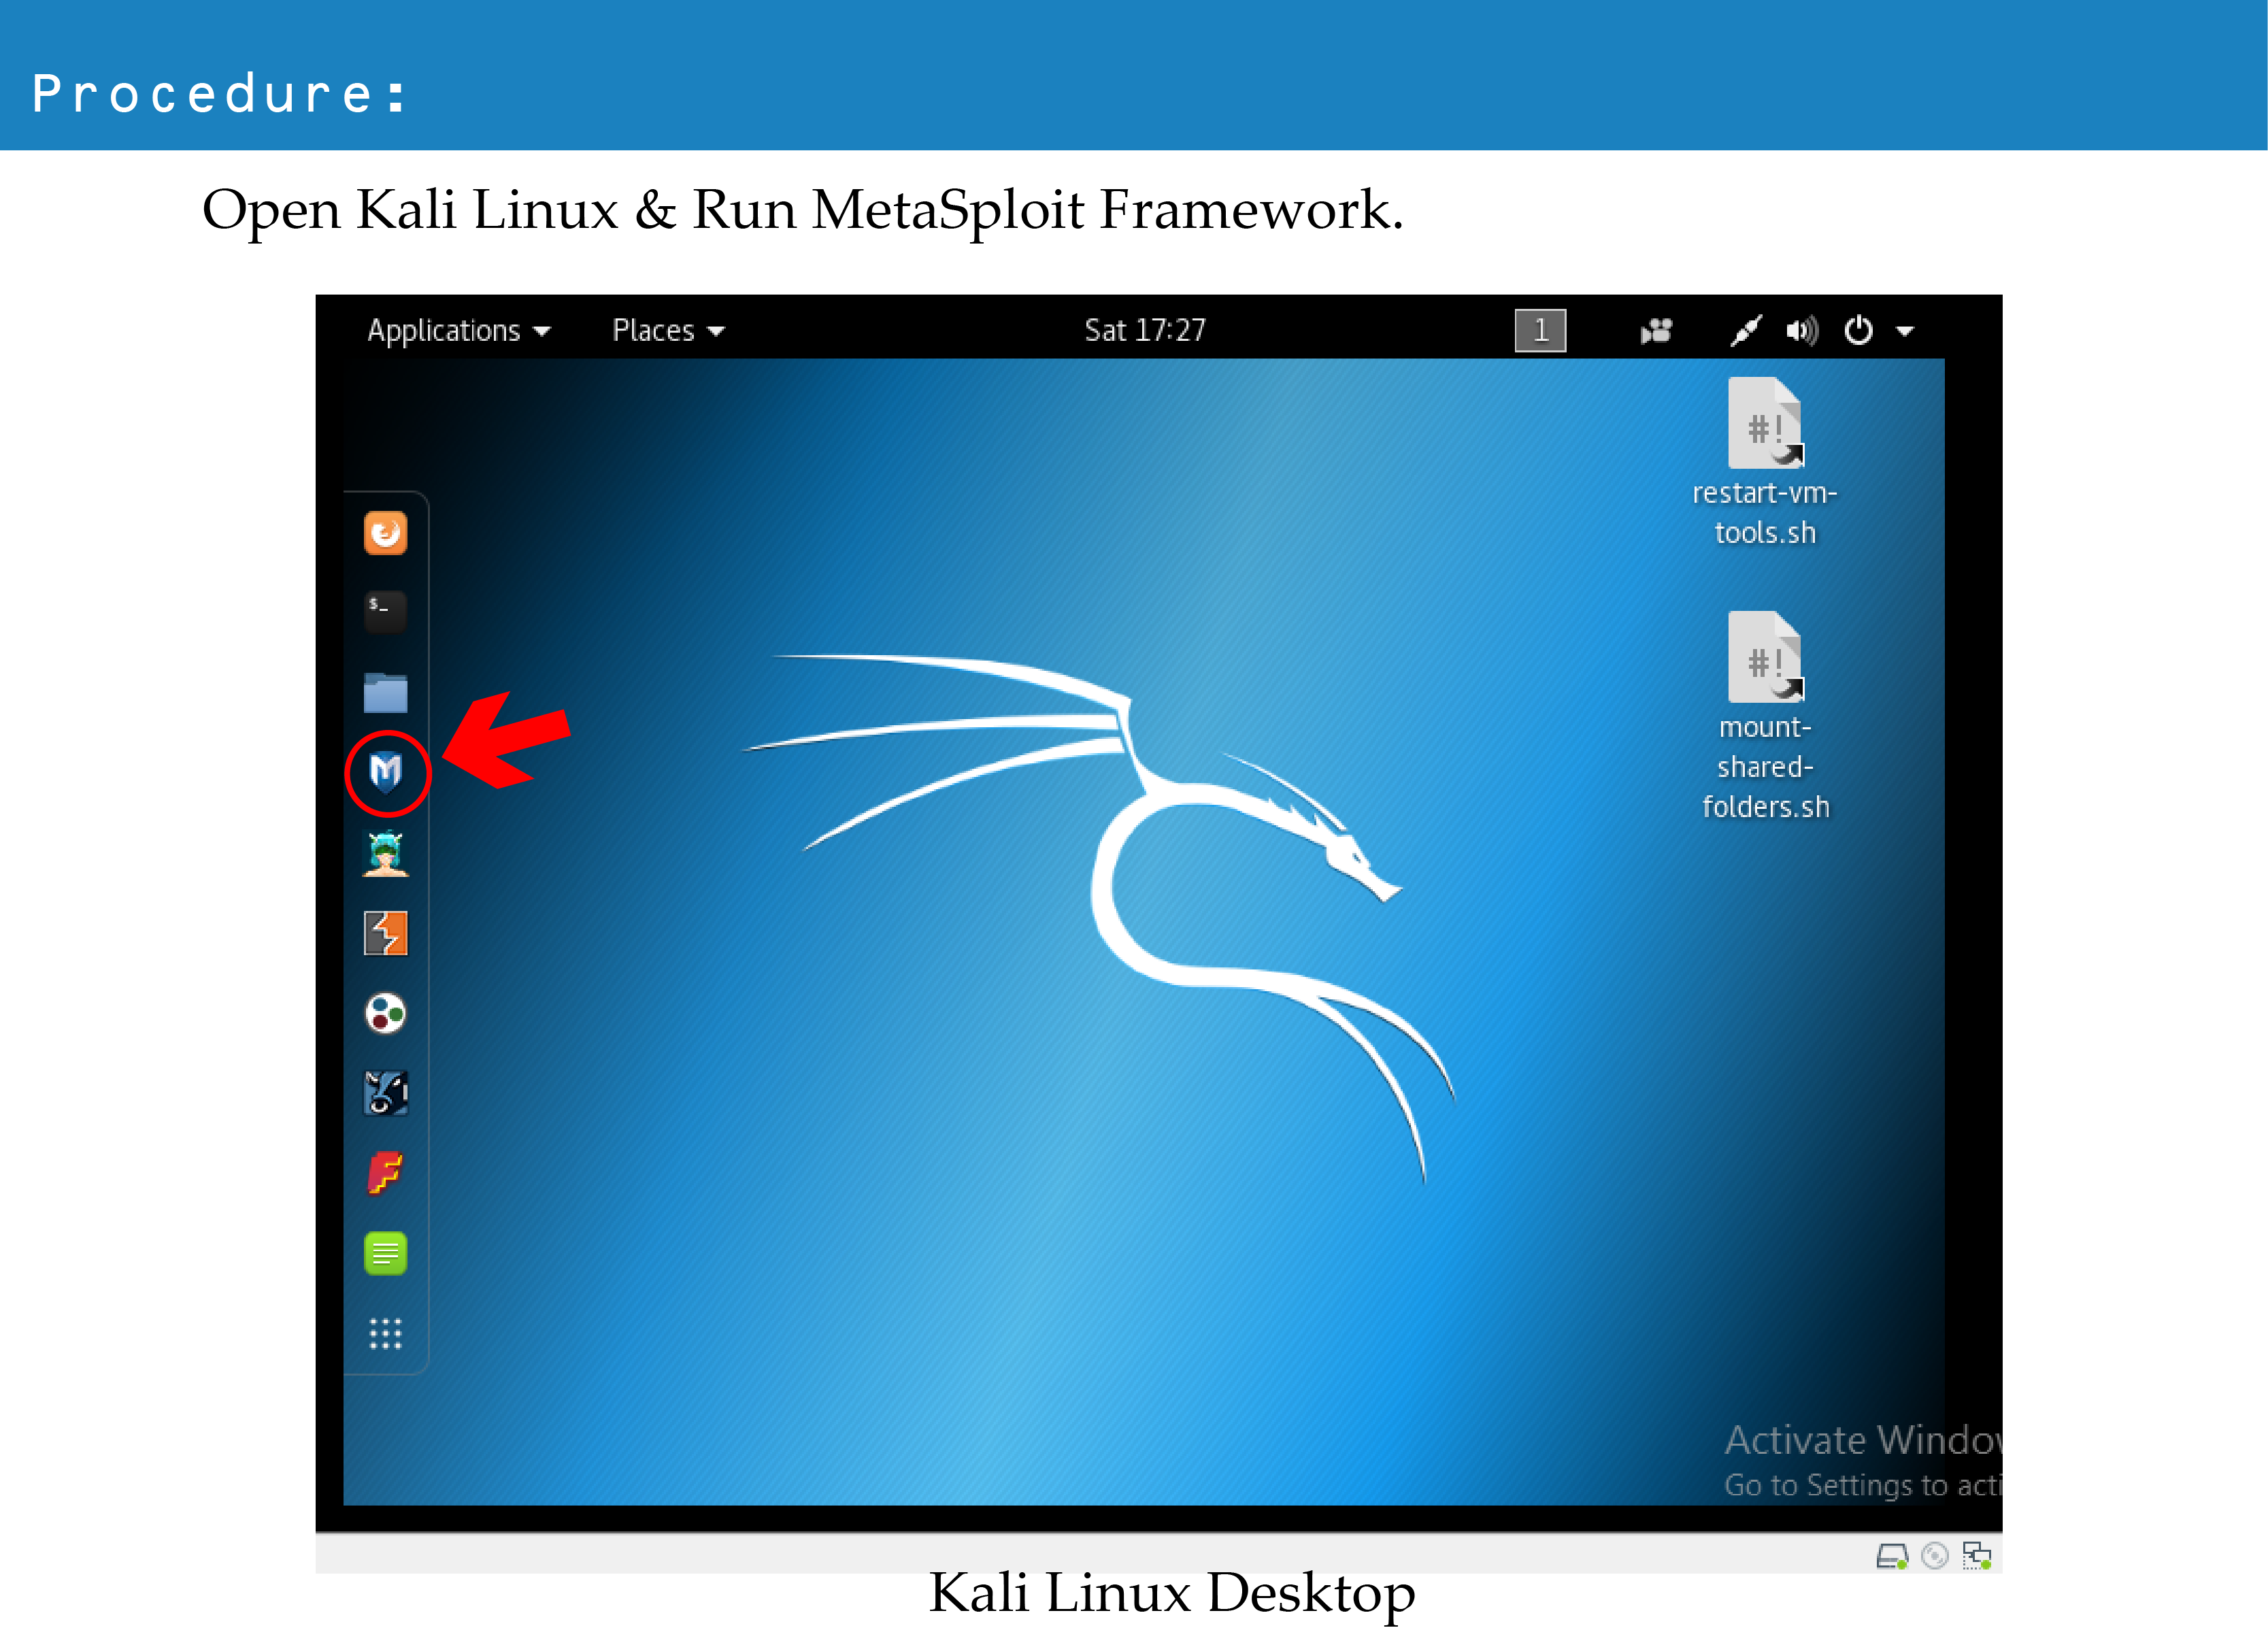
Make sure that Kali Linux VMware VM installed is running and click VM > Install VMware Tools in the menu bar or the VMware Workstation window. The ISO CD image is now inserted to the virtual CD/DVD drive of the VM. You can see the disc icon on the desktop of the guest OS. Open the terminal (Applications > Terminal Emulator).
Go to the directory of the inserted disc that contains VMware Tools by typing:
cd /media/cdrom
Create a directory on your desktop for extracting files from the archive to that directory.
mkdir ~/Desktop/VMwareTools
Extract VMware Tools installation files from the archive by using the following command:
tar -xvzf VMwareTools-10.3.2-9925305.tar.gz -C ~/Desktop/VMwareTools/
where:
tar is the Linux archiver application; x – tells tar to extract files; v – allows the verbose mode to see the output in console; z – tells tar to decompress files from an archive using gzip; f – defines a location of the compressed archive, files from which must be extracted.
Go to the directory where the files have been extracted.
cd ~/Desktop/VMwareTools/vmware-tools-distrib
Run the installer of VMware Tools:
./vmware-install.pl
Answer the questions provided by the console installation wizard. Press Enter to use the default values that are shown in [brackets]. When the installation process of VMware Tools is finished, reboot the VM by typing init 6 in the terminal window.
Note: If you have an Internet connection, you can install VMware Tools with your apt-get Linux package manager by typing in the terminal the following command:
apt-get install open-vm-tools-desktop
Answer the questions provided by the installation wizard as mentioned before.
Configuring Screen Resolution
After installing VMware Tools on Kali Linux VMware VM, you can customize the screen resolution of the guest VM window.
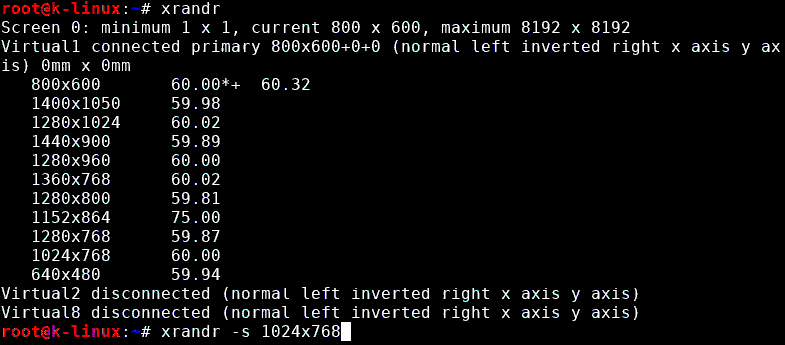
Open the terminal.
Type xrandr to view available display modes. The current display mode is marked with the asterisk (*).
Set the custom resolution, for example, 1024×768, instead of the default resolution (800×600):
xrandr -s 1024×768
 You can also use GUI. Right click the empty space on your VM desktop, go to Applications > Settings > Display. Change resolution in the drop-down menu, click Apply and Close.
You can also enter a full screen mode of your Kali Linux VMware VM by clicking the Full Screen button in the VMware Workstation interface.
How to Connect a WI-FI Adapter to a VMware VM to Be Used by Kali Linux?
If you want to test Wi-Fi networks, then you need a Wi-Fi network adapter connected to a machine on which Kali Linux is running. It is not possible to connect a built-in wireless network adapter (that is usually connected with a PCI Express interface) of a laptop directly to a virtual machine. In this case, you can only use a bridged network mode, but low level adapter features such as entering to a monitor mode will be disabled. If you use a built-in wireless network adapter in the bridged network mode, a guest OS (Kali Linux in our example) identifies the network adapter as an emulated Ethernet adapter.
As you recall, VMware Workstation and ESXi server provide you with the ability to connect USB devices to a VM in the pass-through mode. In this mode a USB device is attached to a VM similarly as it would be attached to a physical machine. When you attach a USB device to a VM, it is disconnected from a host machine. A USB Wi-Fi adapter is what you need in this situation.
Get the external USB Wi-Fi adapter and insert it into a USB port of your host machine (a machine on which VMware Workstation is installed). Make sure that your Kali VM is running. Don’t connect to any Wi-Fi networks on a host machine. In the VMware Workstation window go to VM > Removable devices > [Your USB Wi-Fi adapter name] > Connect (Disconnect from host).
Type ifconfig to check that your USB Wi-Fi adapter is detected by Kali Linux on VMware VM. In our example a wireless adapter is detected and its network interface is named wlan0.

Turn off the wireless network interface:
ifconfig wlan0 down
Change the MAC address of your wireless network adapter to a custom MAC address, for example, FC:FC:48:0A:0B:FF.
macchanger -m fc:fc:48:0a:0b:ff wlan0
Turn on your wireless network interface.
ifconfig wlan0 up
Check whether the MAC address of your Wi-Fi adapter has been changed by using one of the following commands:
macchanger -s wlan0
ifconfig wlan0

If the MAC address of your network adapter was not changed, check the sequence of commands you have run and try again. You can type macchanger –help to see a list of available options for using the macchanger tool.
After changing the MAC address, you can perform penetration testing and security auditing of Wi-Fi networks.
Switch the Wi-Fi network adapter into a monitor mode.
airmon-ng start wlan0

The airmon-ng utility notifies you if there are processes that could potentially cause trouble. It is recommended to kill such processes by typing the command:
airmon-ng check kill
You can additionally change the mac address of the wlan0mon interface.
ifconfig wlan0mon down
macchanger -m fc:fc:48:0a:0b:ff wlan0mon
ifconfig wlan0mon up
where wlan0mon is the name of the virtual monitoring network interface (formerly known as the mon0 interface in BackTrack Linux).
Now you are ready to run the airodump-ng utility.
airodump-ng wlan0mon

As you can see, the USB Wi-Fi adapter connected to the VM in the pass-through mode works fine. You can see access points and associated clients as well as capture wireless network packets for further analysis in the framework of network audit. Penetration testing and security audits are important but details of this process are out of the scope of this blog post. The emphasis of this article is that your Kali Linux deployed on an isolated VM can operate similarly as Kali Linux deployed on a physical machine.
WANT TO GET A DISCOUNT FOR ANY OF THE IT COURSES?
Like and Share our Facebook Page to 5 Friends and you qualify for a discount and free Entrepreneurship Biz Start Up Mobile App and eBook.
https://www.facebook.com/soutechventures AND
https://www.facebook.com/pg/soutechventures/reviews/
SMS Name,Location,Interested with course(see below) of choice to 08034121380
Professional Web Design, Cybersecurity, Hacking, Networking, Kali Linux, Mobile App Development, Project Management, Professional Digital Marketing, Business Analysis, Microsoft Power BI, Python for Data Science, PHP Software Development, IBM SPSS Research and Statistical Analysis, Excel for Business, Solar and Inverter Design and Installation and so many others….
====================
Conclusion
Kali Linux is a great Debian-based Linux distribution full of useful tools for penetration testing. Above, we have explored how to install Kali Linux on VMware Workstation VM. Creating a VM and the installation process of the operating system is not difficult, and a GUI provides useful understandable tips and comments.
Want to Learn More About Cyber Security
Cybersecurity and Hacking Course, Kali Linux Training and Cybersecurity
Click here for Course Modules Details

Related posts:
 Top 100 Kali Linux Commands and How to use them: Cyber Security Training in Nigeria
 WordPress Subdomain | How To Install WordPress On Subdomain? SOUTECH Hosting
 SOUTECH Hub Free Digital Skills Training
 October 2019 Professional IT Training: website design, ethical hacking, digital marketing, data science abuja
 Digitizing Owerri: What must be done now