
- August 14, 2020
- Posted by: Data Science Training and Solution
- Category: Data Analysis and Virtualization

Jupyter Notebook for Beginners:
Installation
The easiest way for a beginner to get started with Jupyter Notebooks is by installing Anaconda. Anaconda is the most widely used Python distribution for data science and comes pre-loaded with all the most popular libraries and tools. Some of the biggest Python libraries wrapped up in Anaconda include NumPy, pandas, and Matplotlib, though the full 1000+ list is exhaustive. This lets you hit the ground running in your own fully stocked data science workshop without the hassle of managing countless installations or worrying about dependencies and OS-specific (read: Windows-specific) installation issues.
To get Anaconda, simply follow the instructions for the installation of Anaconda on Mac or Windows.
Download and Install Anaconda
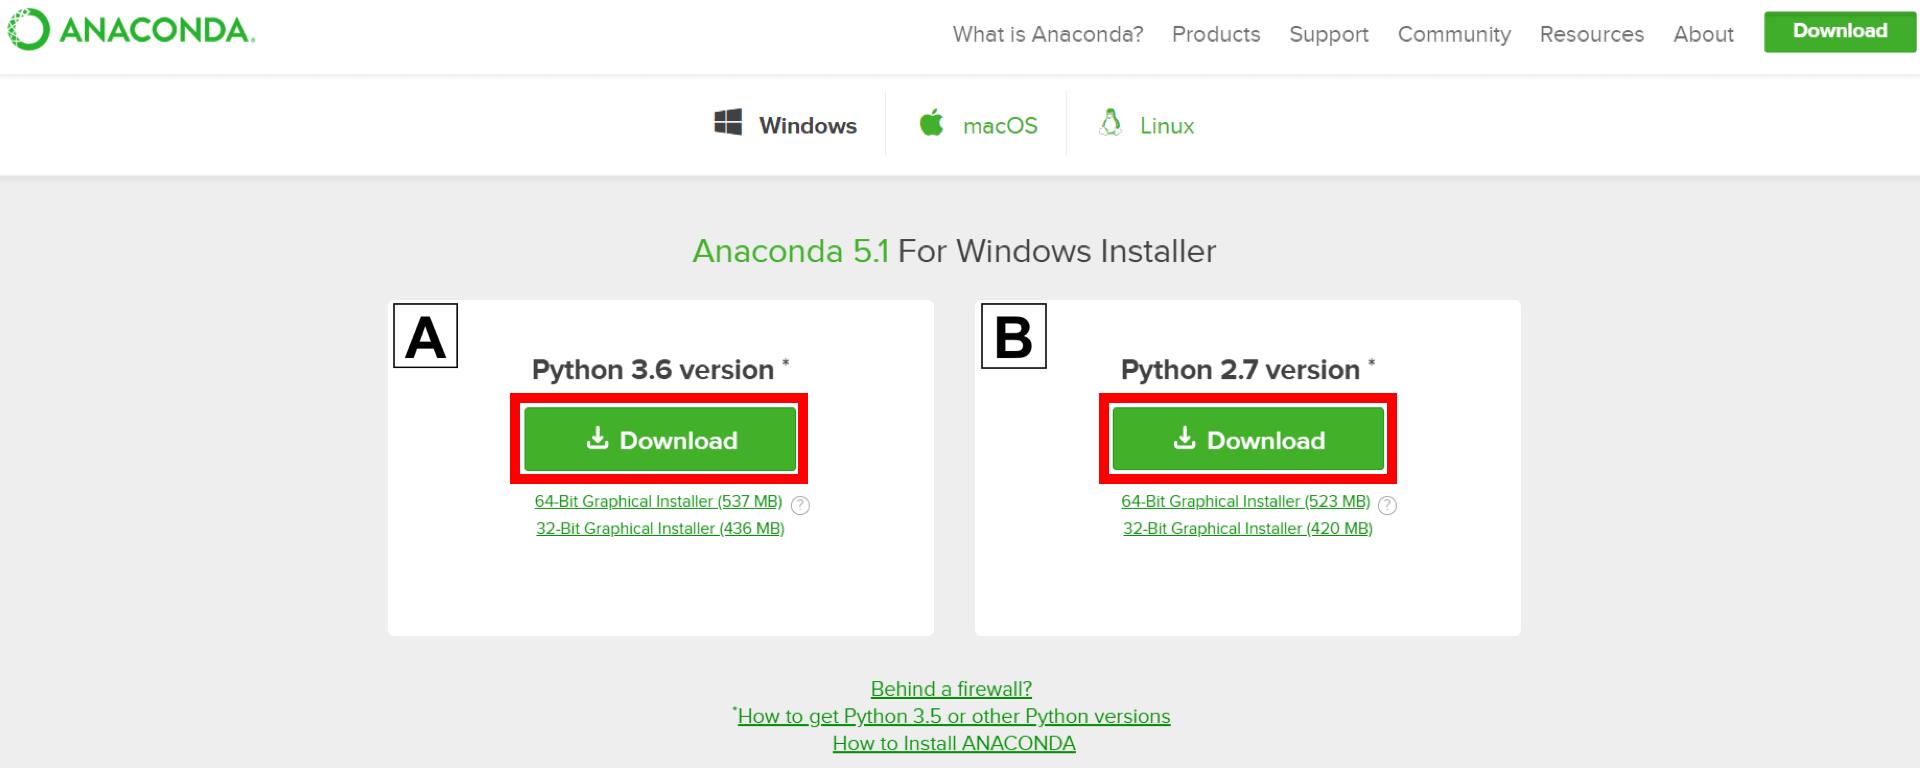
1. Go to the Anaconda Website and select your type of OS then choose a Python 3.x graphical installer (A) or a Python 2.x graphical installer (B). If you aren’t sure which Python version you want to install, choose Python 3. Do not choose both.
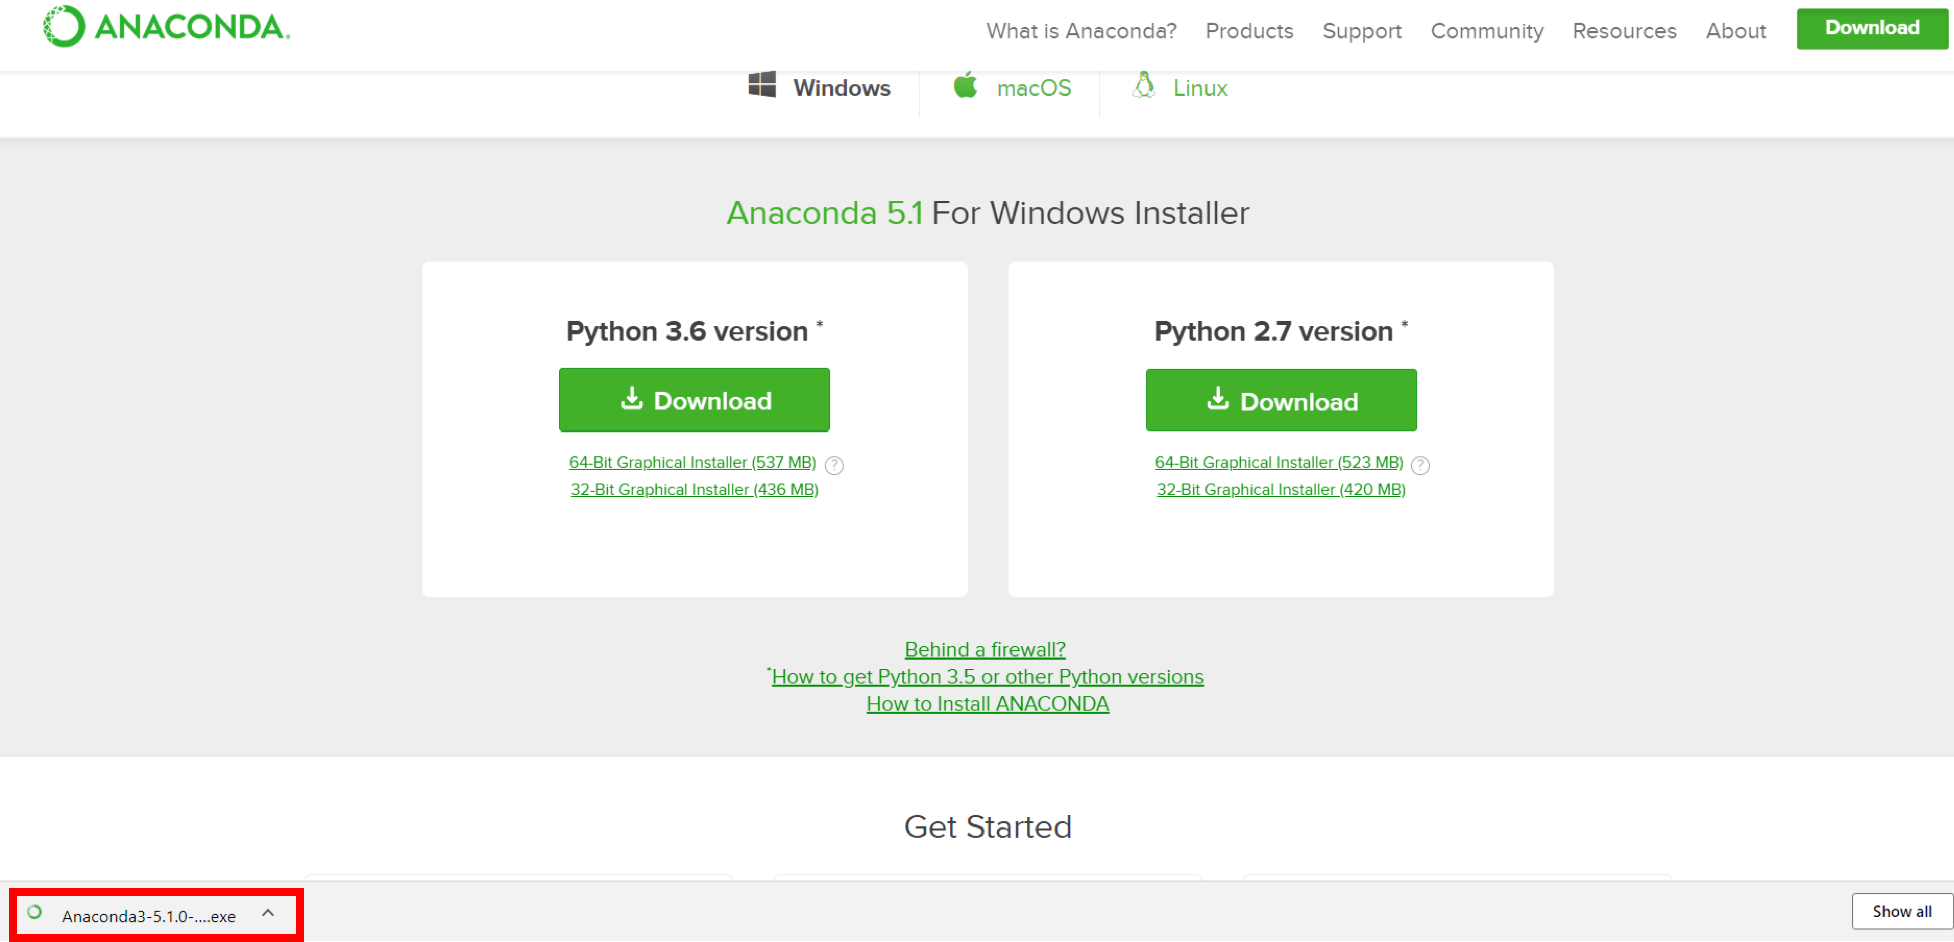
 2. Locate your download and double click it.
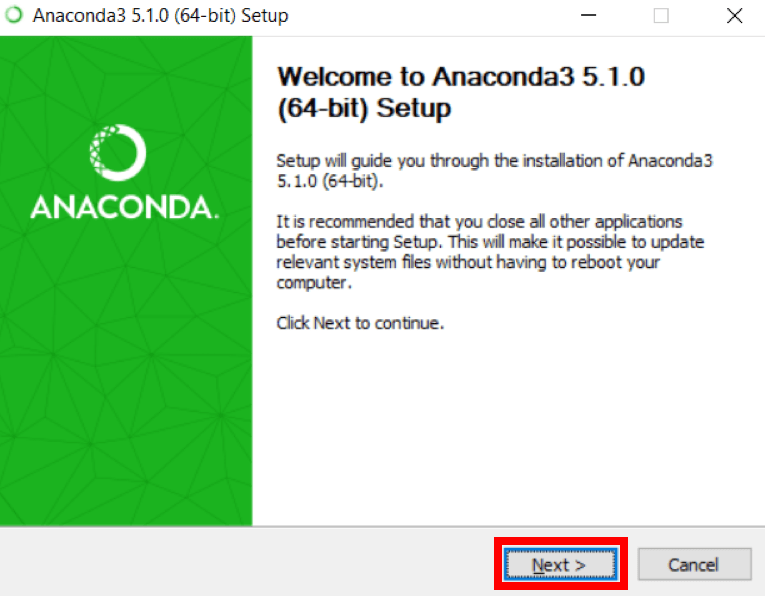
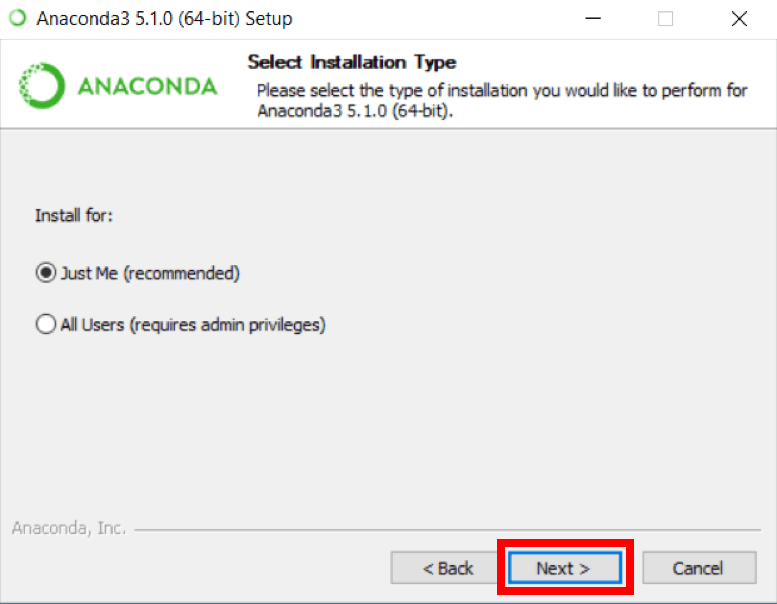
 When the screen below appears, click on Next.
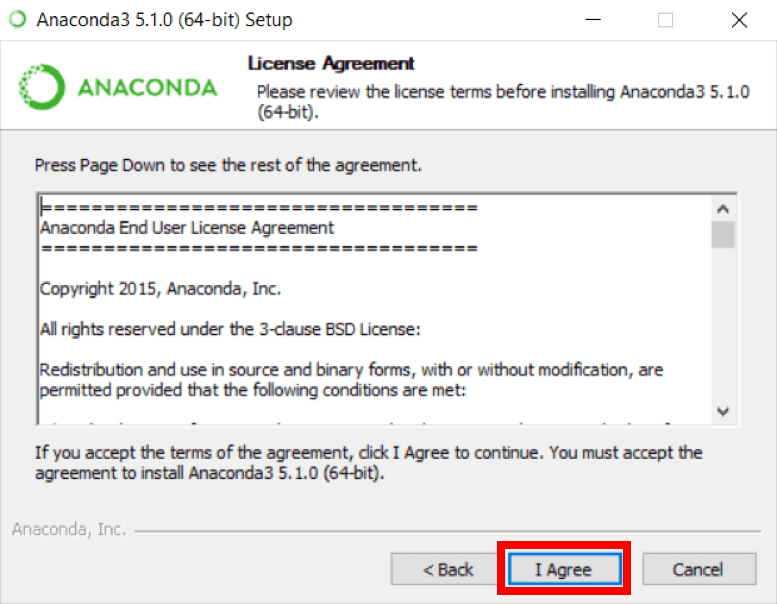
 3. Read the license agreement and click on I Agree.
 4. Click on Next.
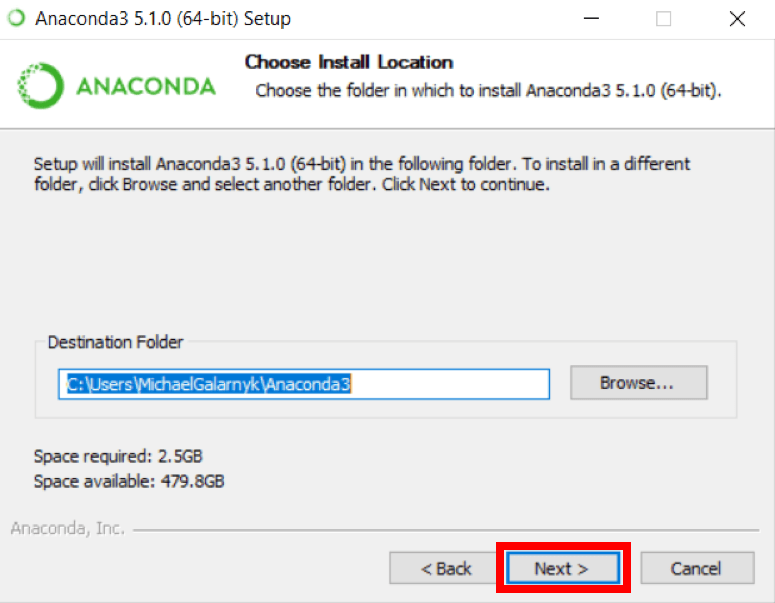
 5. Note your installation location and then click Next.
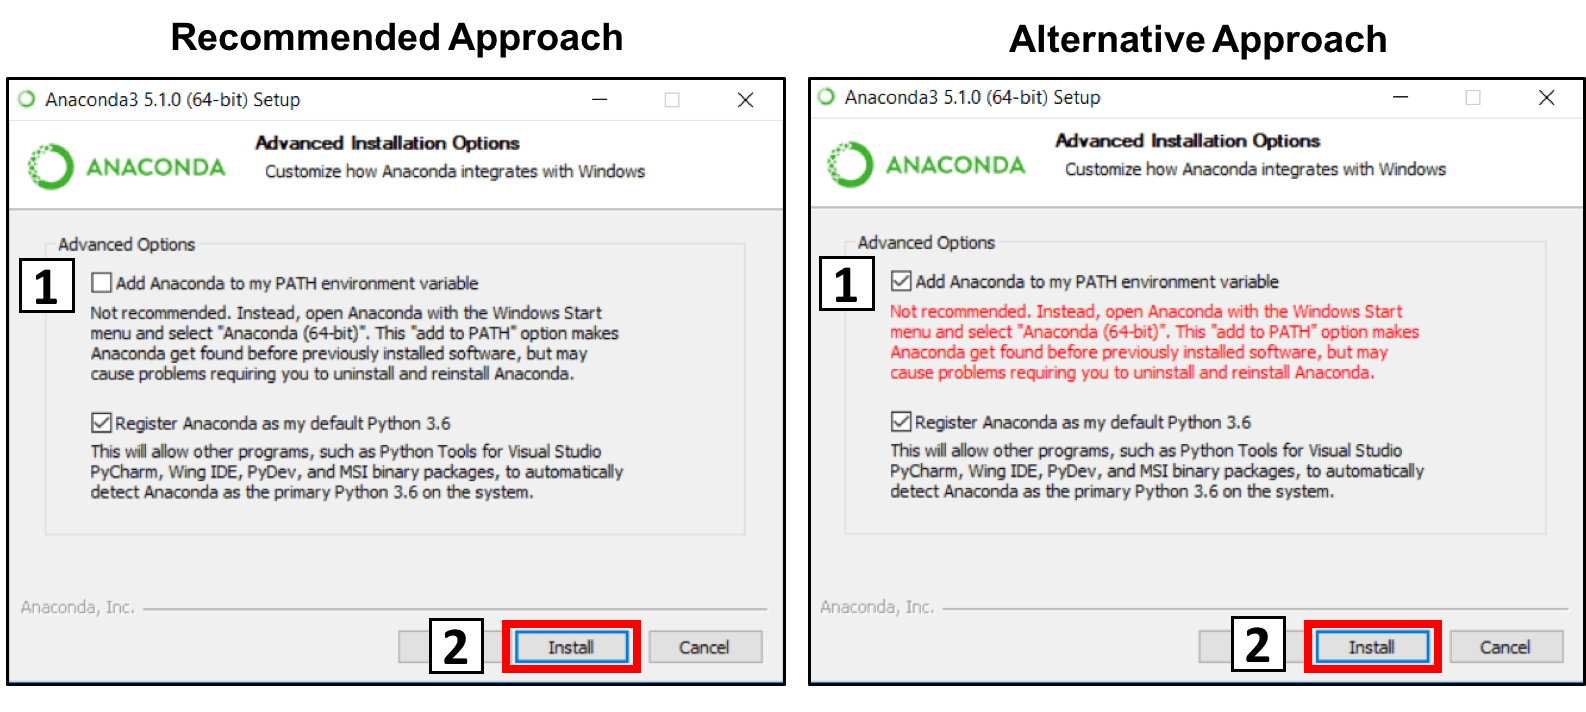
 6. This is an important part of the installation process. The recommended approach is to not check the box to add Anaconda to your path. This means you will have to use Anaconda Navigator or the Anaconda Command Prompt (located in the Start Menu under “Anaconda”) when you wish to use Anaconda (you can always add Anaconda to your PATH later if you don’t check the box). If you want to be able to use Anaconda in your command prompt (or git bash, cmder, powershell etc), please use the alternative approach and check the box.
 7. Click on Next.
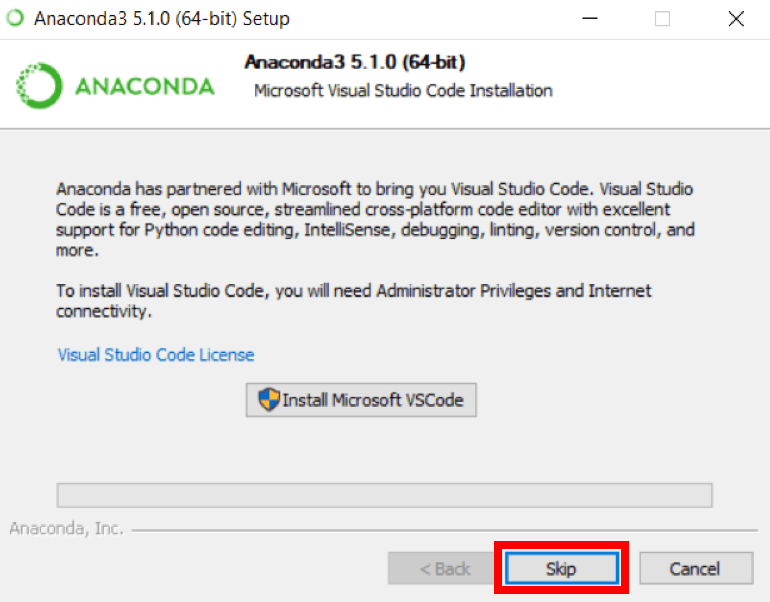
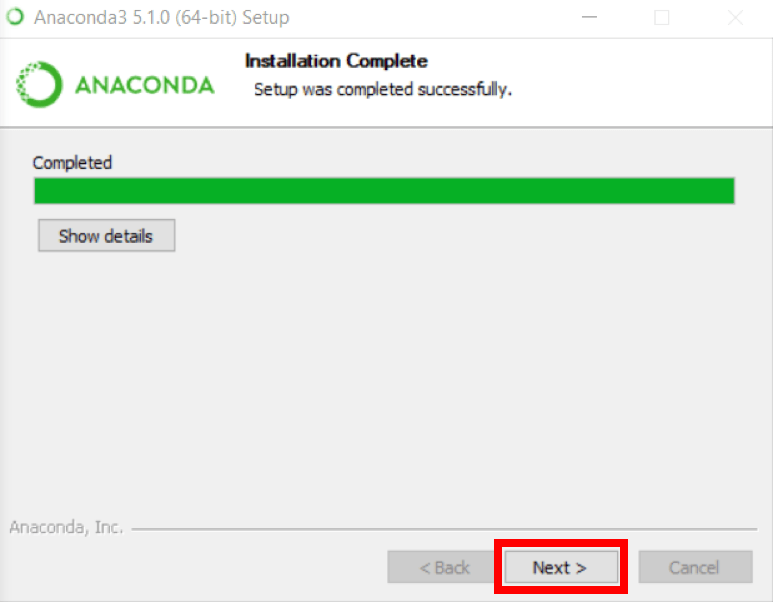 8. You can install Microsoft VSCode if you wish, but it is optional.
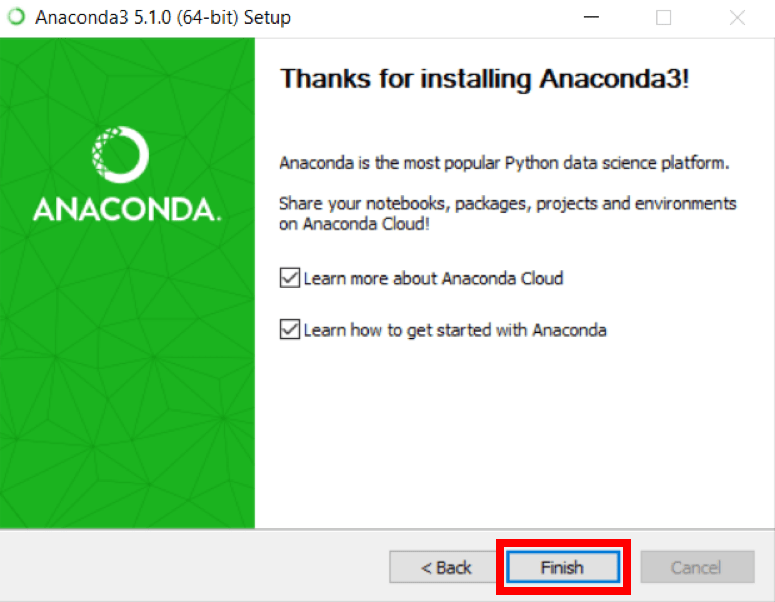
 9. Click on Finish.
Add Anaconda to Path (Optional)
This is an optional step. This is for the case where you didn’t check the box in step 6 and now want to add Anaconda to your Path. The advantage of this is that you will be able to use Anaconda in your Command Prompt, Git Bash, cmder etc.
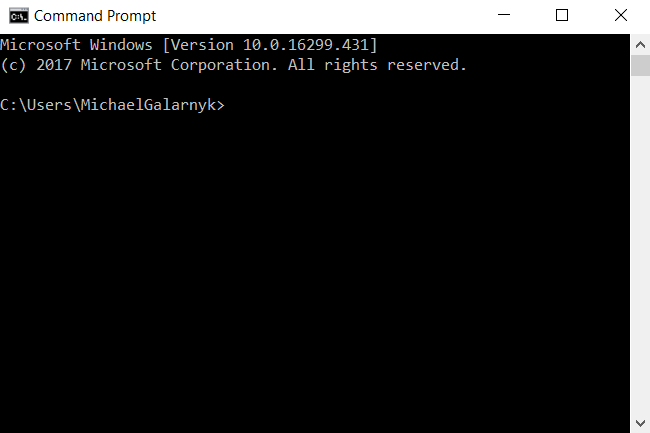
1. Open a Command Prompt.
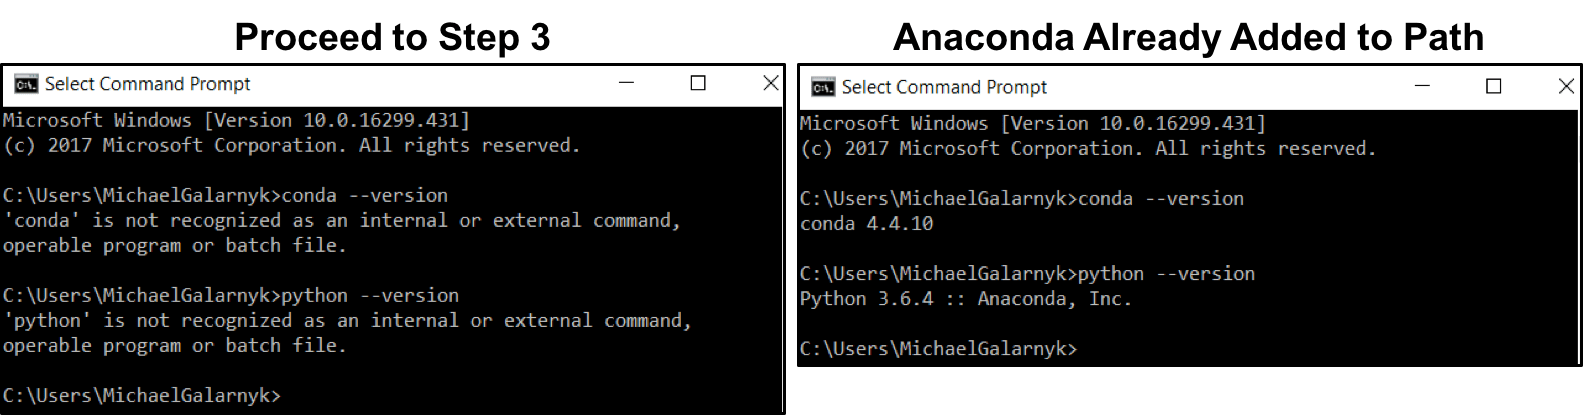
 2. Check if you already have Anaconda added to your path. Enter the commands below into your Command Prompt. This is checking if you already have Anaconda added to your path. If you get a command not recognized error like in the left side of the image below, proceed to step 3. If you get an output similar to the right side of the image below, you have already added Anaconda to your path.
conda --version

python --version
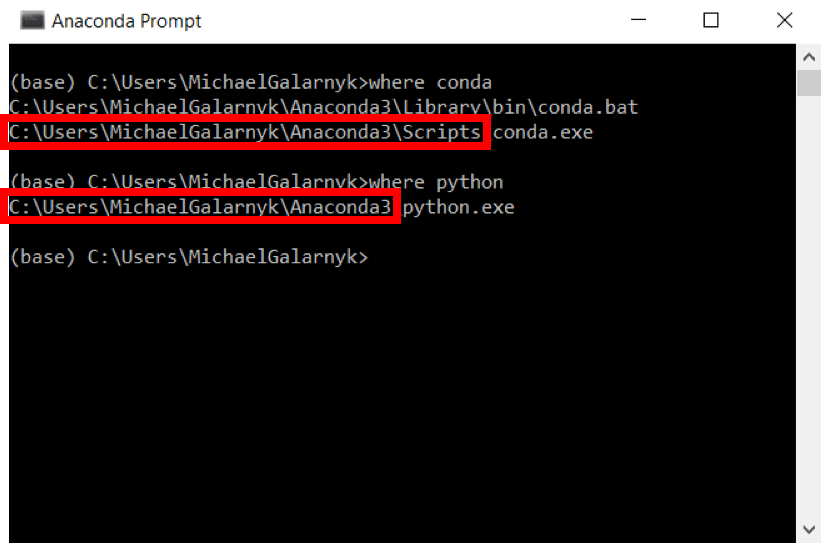
 3. If you don’t know where your conda and/or python is, open an Anaconda Prompt and type in the following commands. This is telling you where conda and python are located on your computer.
where conda
where python
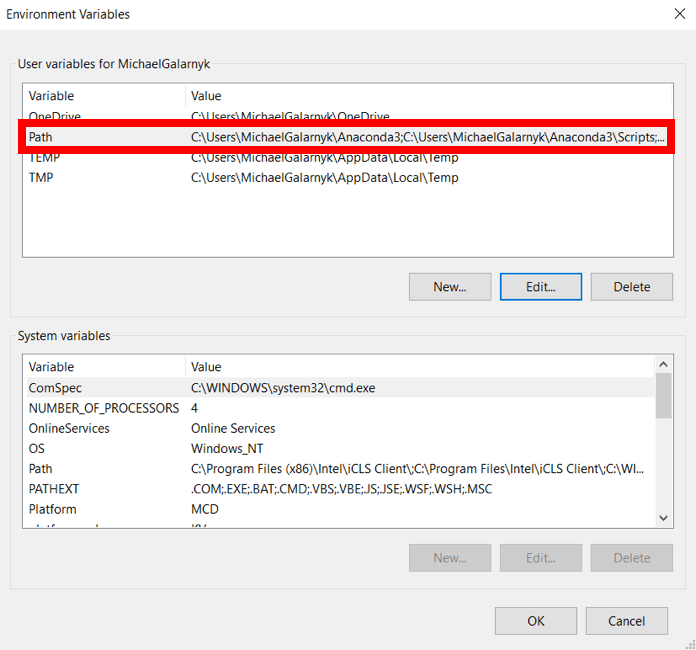
 4. Add conda and python to your PATH. You can do this by going to your Environment Variables and adding the output of step 3 (enclosed in the red rectangle) to your path. If you are having issues, here is a short video on adding conda and python to your PATH.
 5. Open a new Command Prompt. Try typing
 conda --version and python --version into the Command Prompt to check to see if everything went well.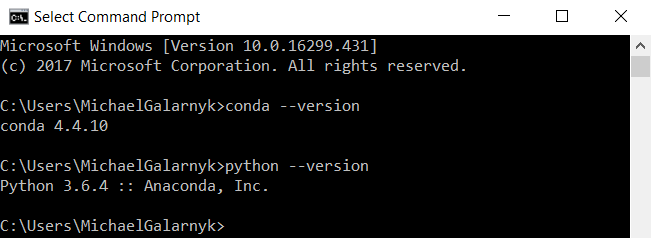
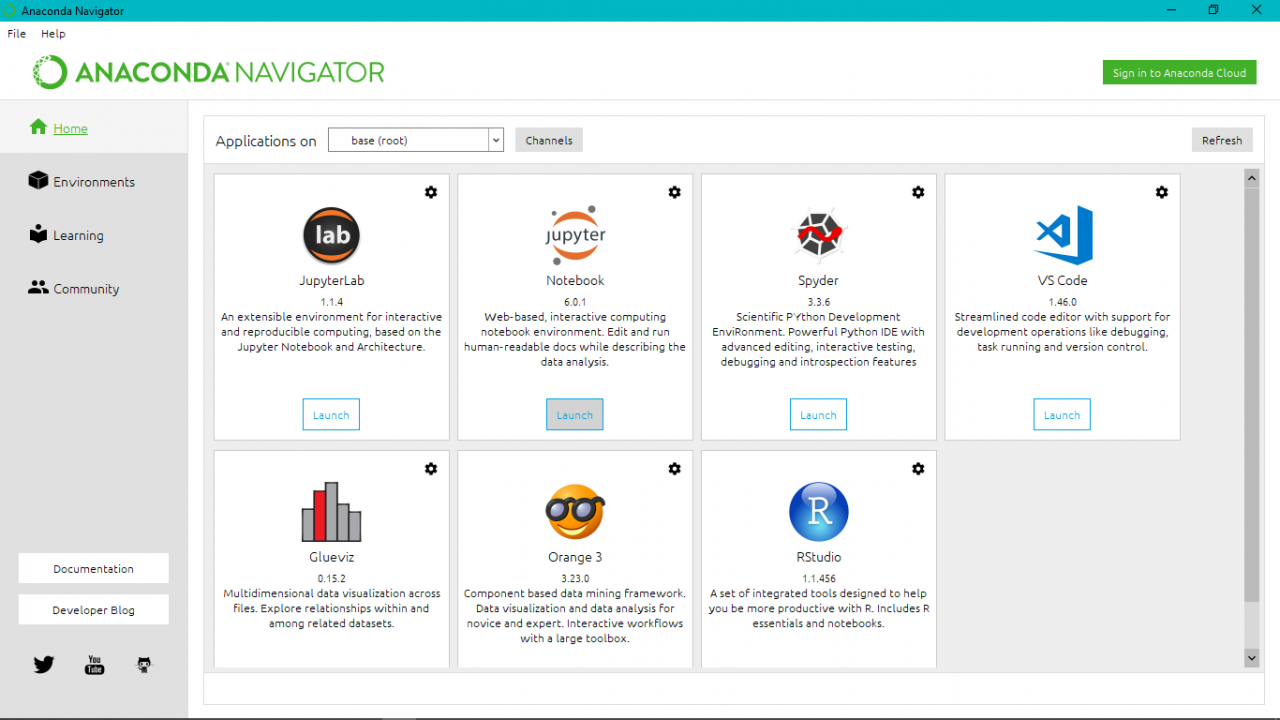
Once Anaconda is installed, Open the Anaconda Software and launch Jupyter notebook
Or Anaconda Prompt (Miniconda3), Type and Run: pip3 install jupyter
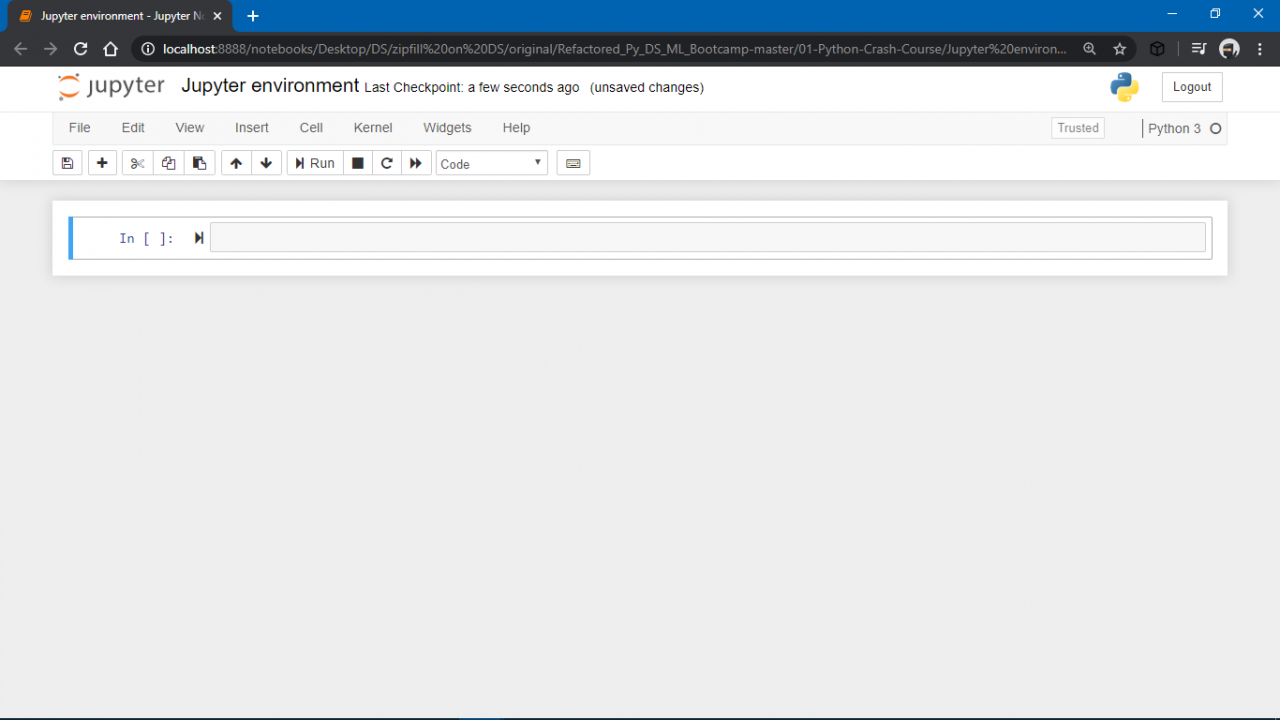
How Jupyter Notebook looks like
Related posts:
 Data Science Tutorial Guide: Nigerian Population Data analysis Case Study
 Data Science Process: Collecting, Cleaning, Analyzing, Modeling and Visualizing Data
 Pandas Tutorial- How to run analysis using Pandas Python
 Pandas Tutorial- How to run analysis using numeric python (numpy) with example
 Ethical Hacking , Data Science, Digital Growth Hack Workshop in Owerri- SOUTECH Hub