
- August 7, 2018
- Posted by: SouTech Team
- Category: Blog, Development, eBusiness and eCommerce, Web Development Training, Website Design Service Abuja, Wordpress Website Design Training
An e-store or e-commerce website is a website that allows people to buy products and services from any part of the world. A functional e-commerce store should allow customers to make purchases, allow shop managers to update products and accept payments. An e-commerce store can be integrated on a business or personal website, and even on a blog.
There many ways and a good number of technologies that could be used in building an e-commerce store; such as coding from scratch (which can be time-consuming) using content management system (most recommended and widely used by known e-commerce giants).
| Want to start an eBusiness and Grow it Globally with free IT, Legal, Internet Discounts,3 Months SME Startup Course, ePayment Integration, Biz Development Services, Free Website, Free SMS Units/Portal all done for you within 30 Days?
Start Here>> Click >>> Start a Digital Business in Nigeria
Today I will center this article on the WordPress content management system. One good thing about using WordPress is that; you can have your e-commerce store integrated into either your blog, personal website, corporate website, forum or any other categories of websites with no extra cost or professional services needed.
What you must know
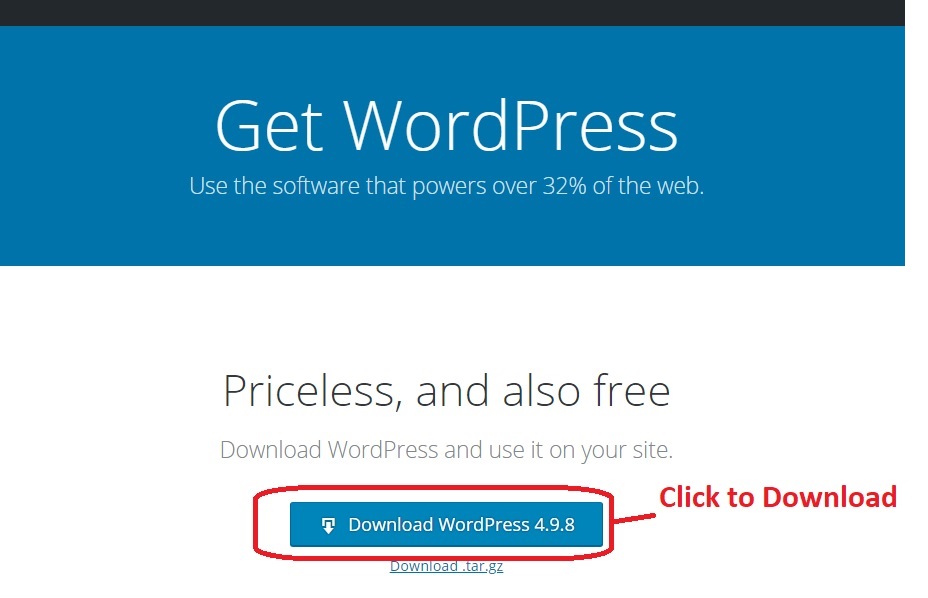
This guide did not cover how to install WordPress. You must already know how to use WordPress before following this guide. If you want to learn how to build WordPress websites, please click here. You must already have a WordPress website installed and running before following this guide. If you are using a local server for development, you will need to have internet access.
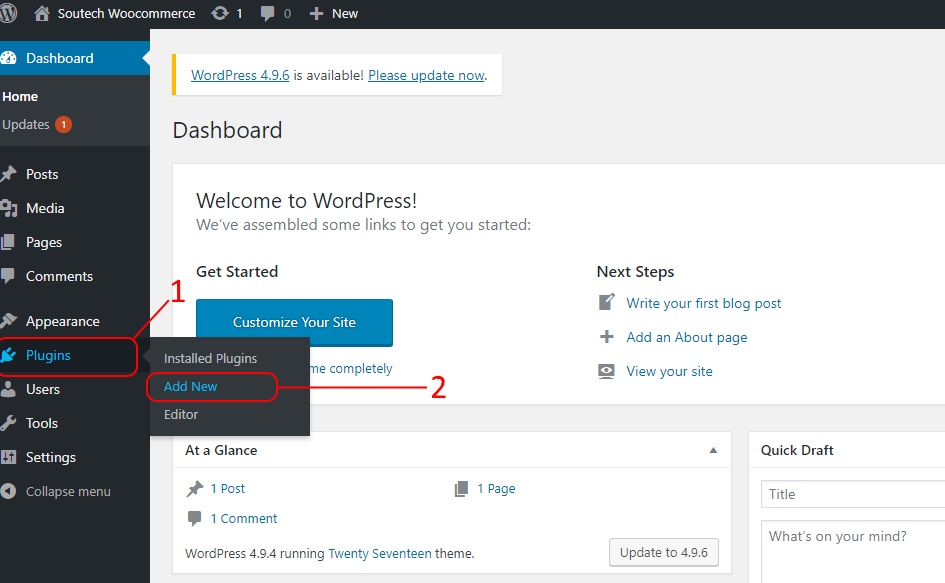
Step one: Install WooCommerce
There are about 3 different ways to install plugins in WordPress. You can either download the zip file and upload into the wp-content/plugins folder via file manager in Cpanel, or upload it via the WordPress dashboard or you can install without downloading, directly from the WordPress repository.
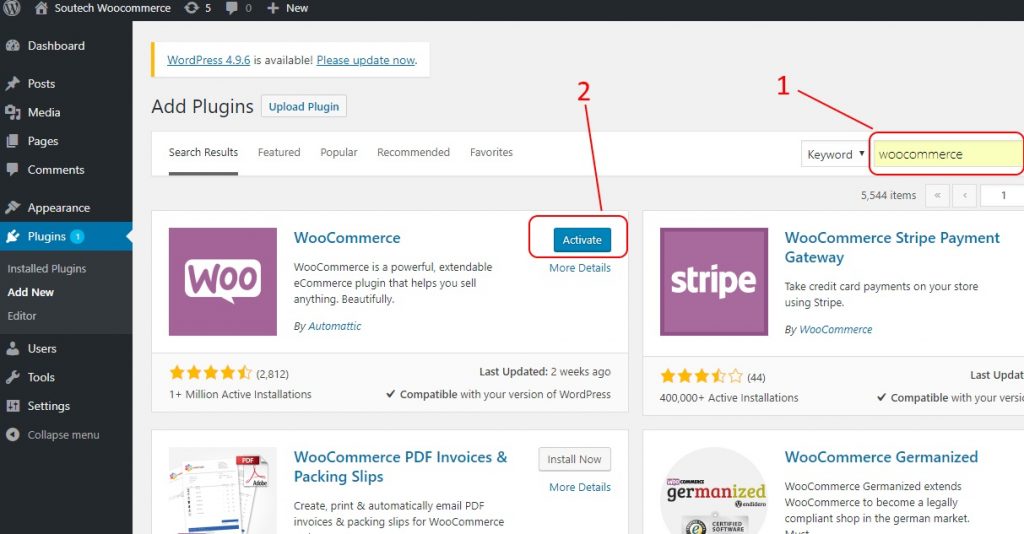
Using the WordPress repository: search for WooCommerce, click to install and then activate.
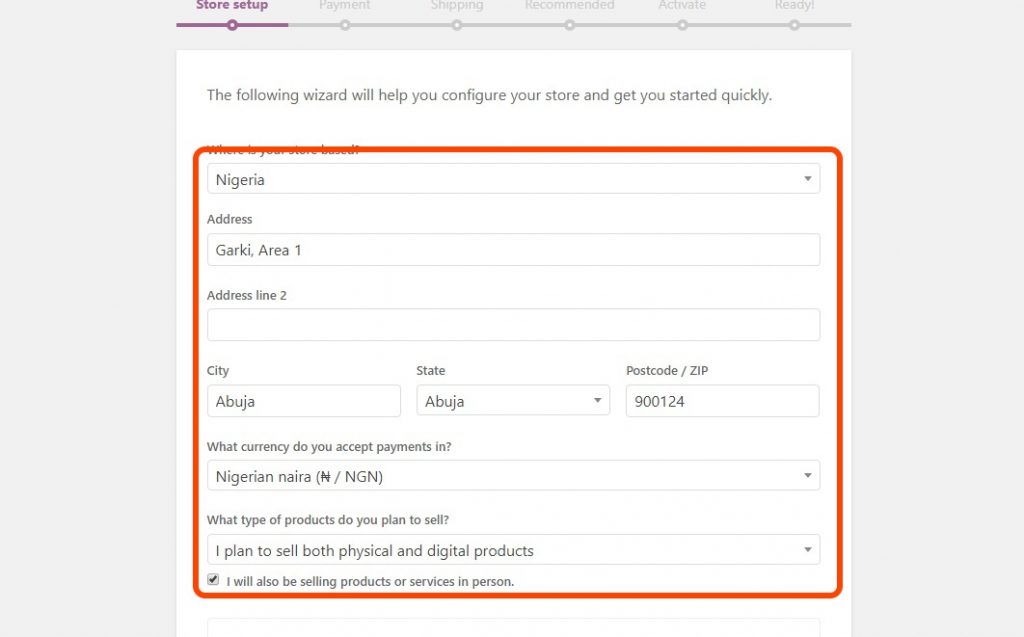
Step two: Store information
After installing and activating WooCommerce, you will be prompt by the WooCommerce setup wizard to update your store information. These include store location, currency, type of products you will be selling etc.
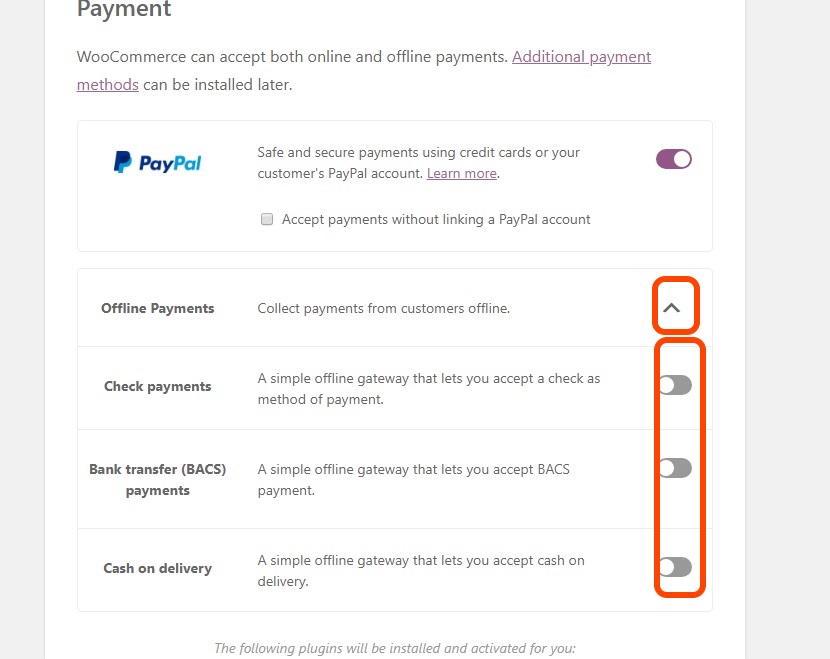
Select an enable offline payments, such as payment on delivery and Bank Transfer Payment.
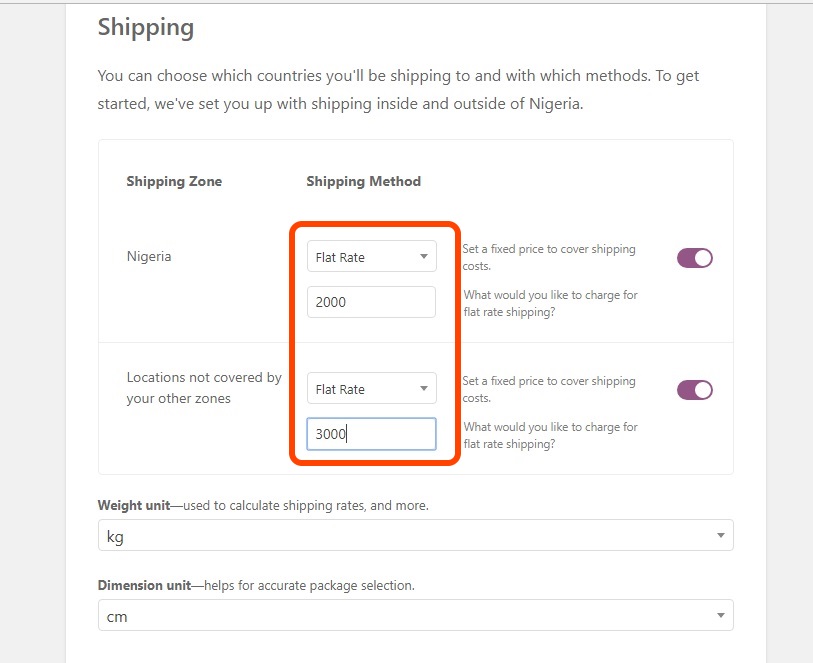
Choose a shipping method (You can always change this from setting).
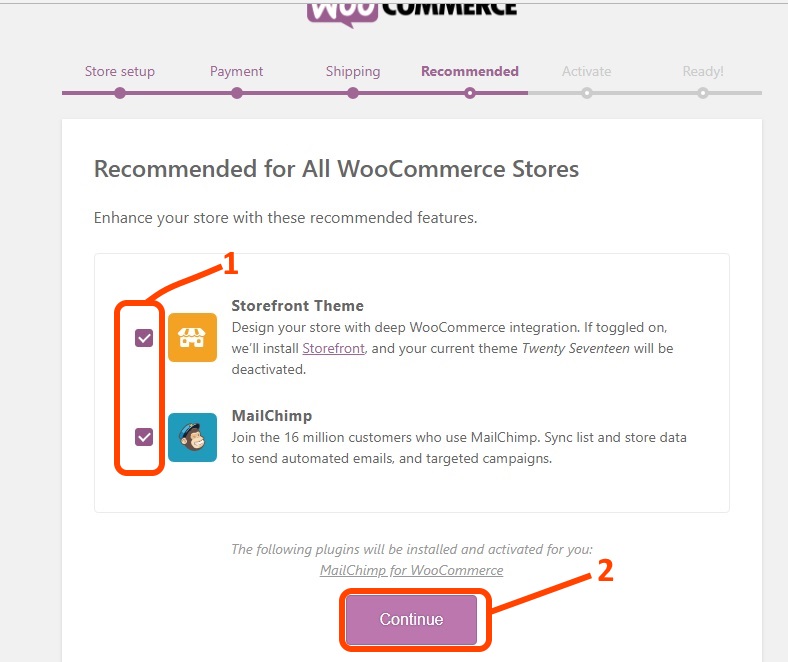
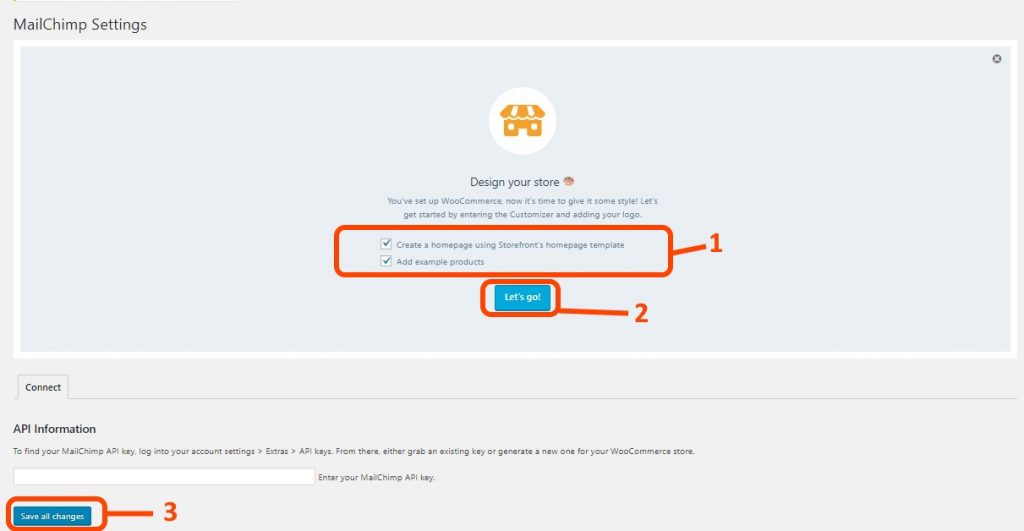
There some recommendations that WooCommerce offers such are seen below. If you want to use the free theme offered by WooCommerce and wish to install MailChimp for Marketing, then tick as seen below.
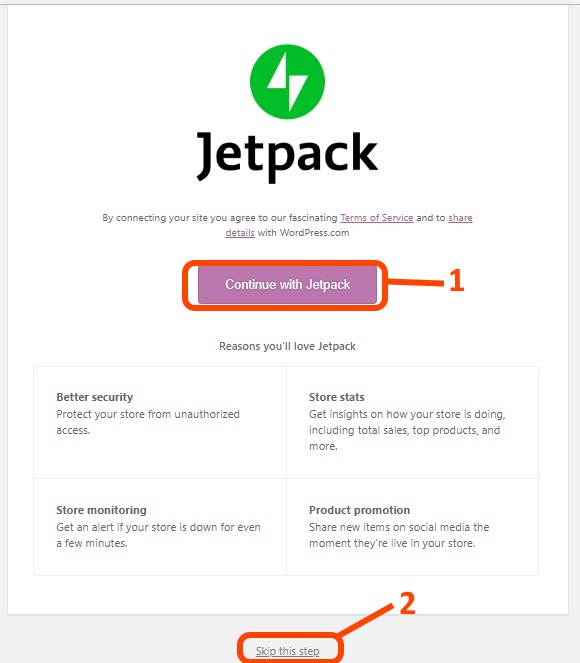
There is an optional recommendation to install Jetpack (this can always be done later), I will skip this.
Next is for you to apply the example products that come with the WooCommerce theme we choose earlier and the MailChimp API key (if you have any).
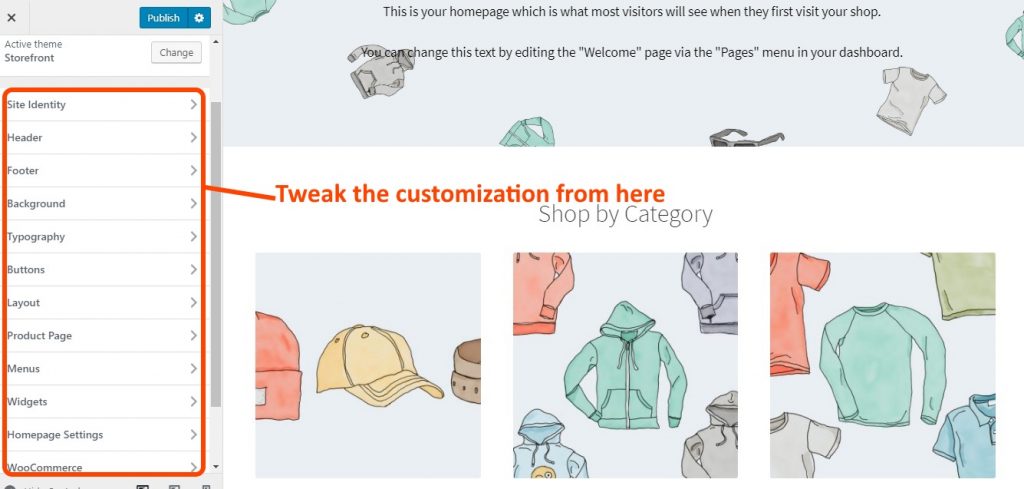
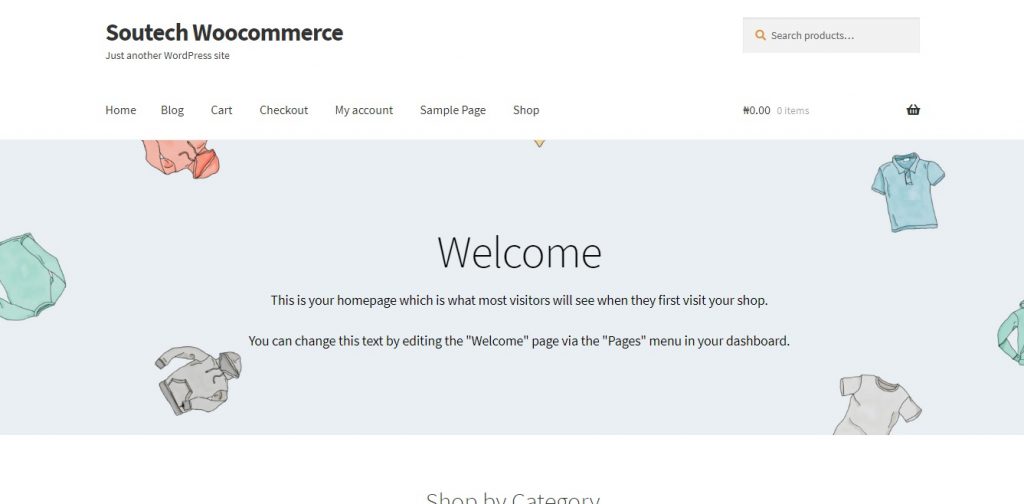
Using the WooCommerce storefront theme and demo products, our e-store should look like below. Notice the customization panel, it can be used to modify the UI of the e-store.
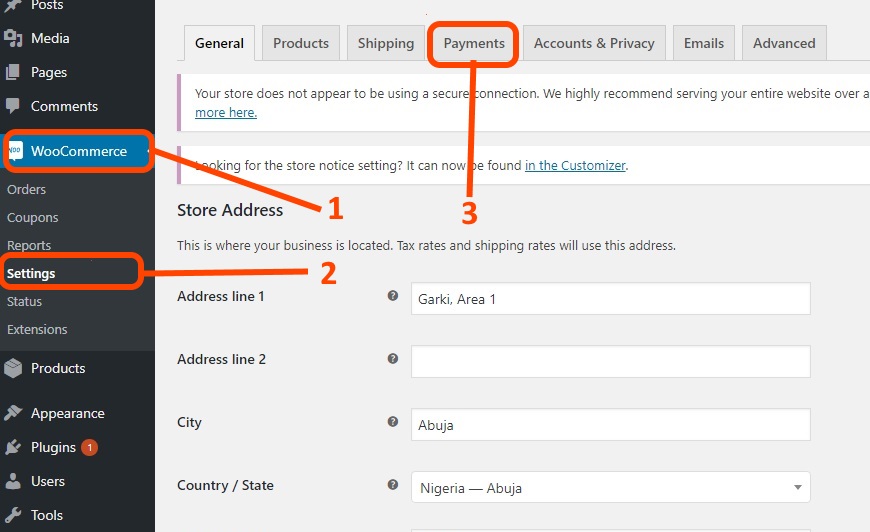
Step three: payments
Navigate to WooCommerce >> Settings from your WordPress dashboard, click on the payment tab. I will be implementing payment options. First is the Bank transfer (BACS).
Click the Manage button on the bank transfer payment option and start adding your bank details in order to receive payment via bank transfers. Using the bank transfer option signifies that you must confirm completion of a transaction before releasing product or service to a customer.
From the list of payment method, click “manage” on the “Direct Bank Transfer” method.

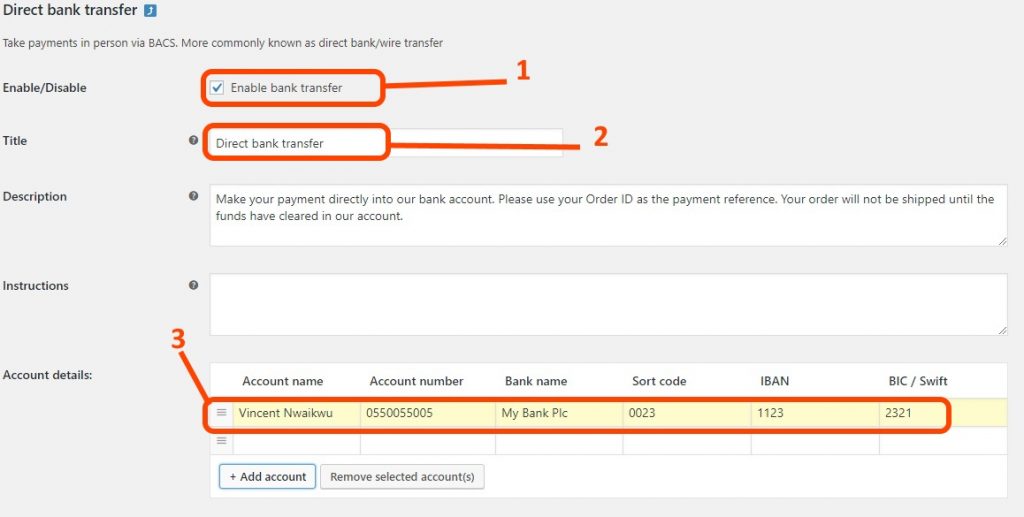
Enable this payment method, give it a title or use the default title as seen below. Add account numbers. To add more account details, click the add account button.
Third party payment option
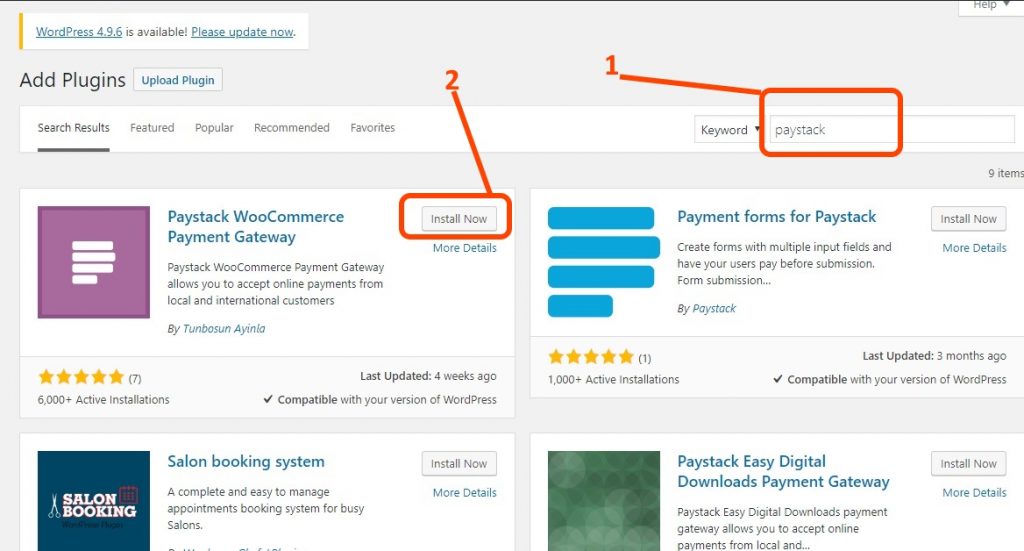
In this guide, I will be using Paystack as our third party payment gateway. To install the Paystack gateway, navigate to plugins>>add new via your WordPress dashboard and search for Paystack, install and activate Paystack.
Before using Paystack, you must have an account with paystack. Visit Paystack.com and signup for a new account, your account will automatically be assigned to “test mode” pending when you meet some requirements as stipulated by Paystack. For this guide, we are going to use the test mode.
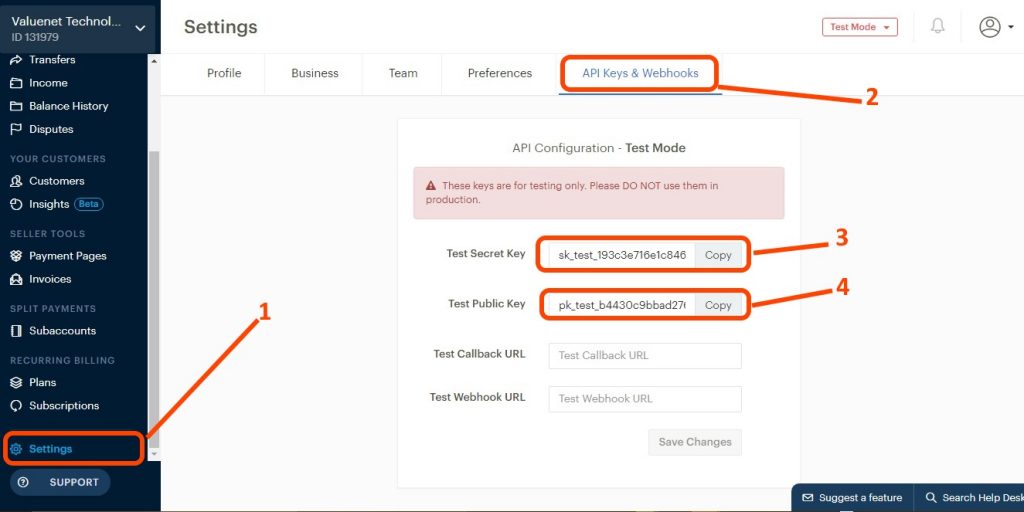
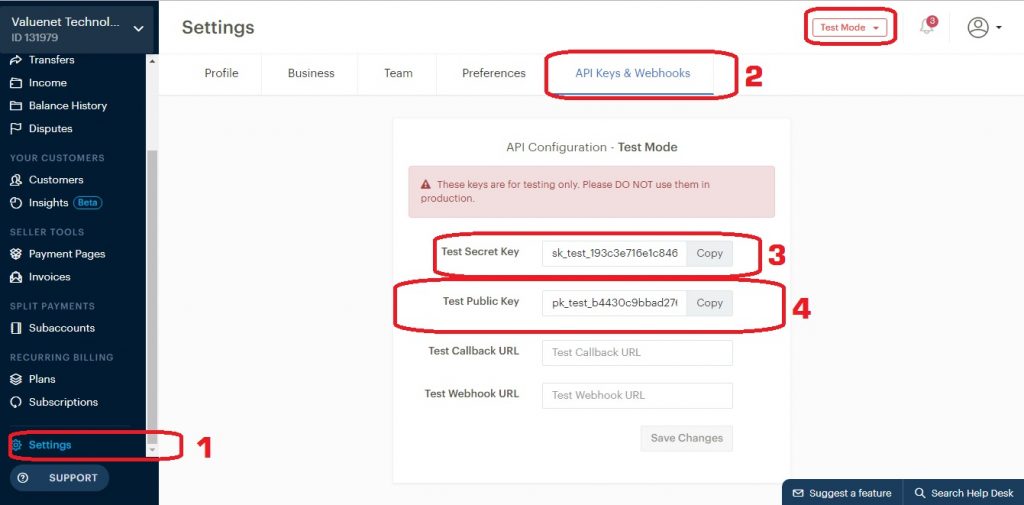
After creating your paystack account, from your paystack dashboard navigate to settings, and click on API Keys and Webhooks. From here we want to copy to keys, test secret key and test public key, without these key our gateway will not establish a connection with the paystack API.
Back to our WordPress Dashboard WooCommerce >> settings, select the payments tab and click “add” from the Paystack method.
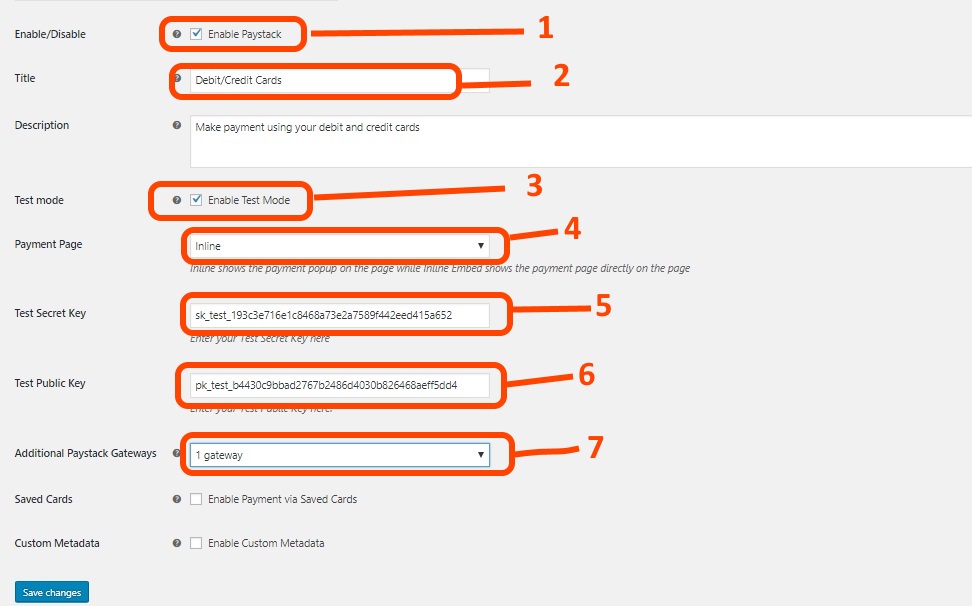
Enable Paystack, set a title.
Enable test mode and apply the test secret and public keys you got from Paystack.
Save changes.
Test our e-commerce store
Now that we have implemented our payment gateway, let test our e-store and see how it goes.
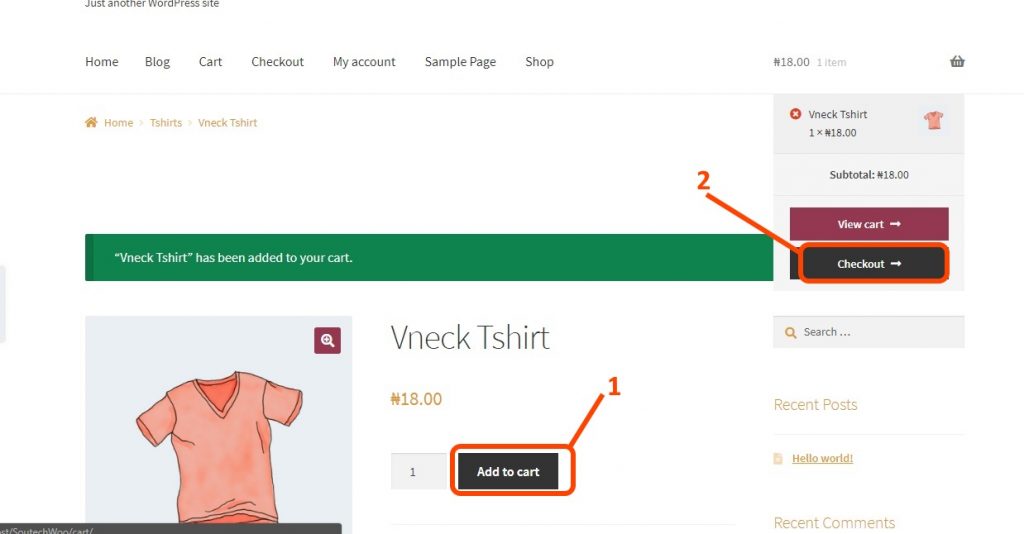
I have visited the store as a customer using another browser.
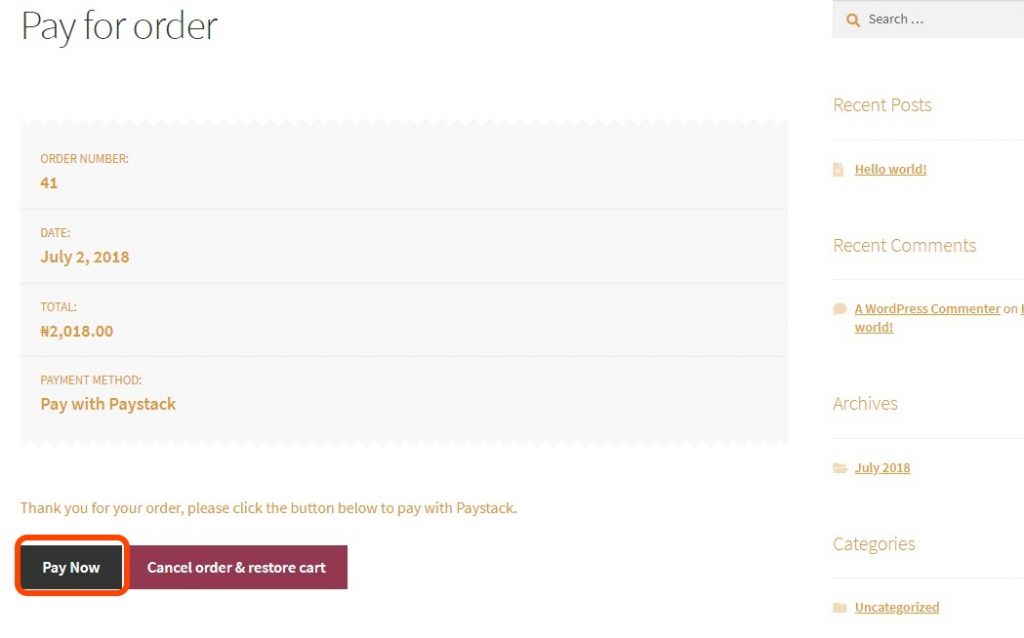
Upon checkout, I supply the required information and choose Paystack for payment.
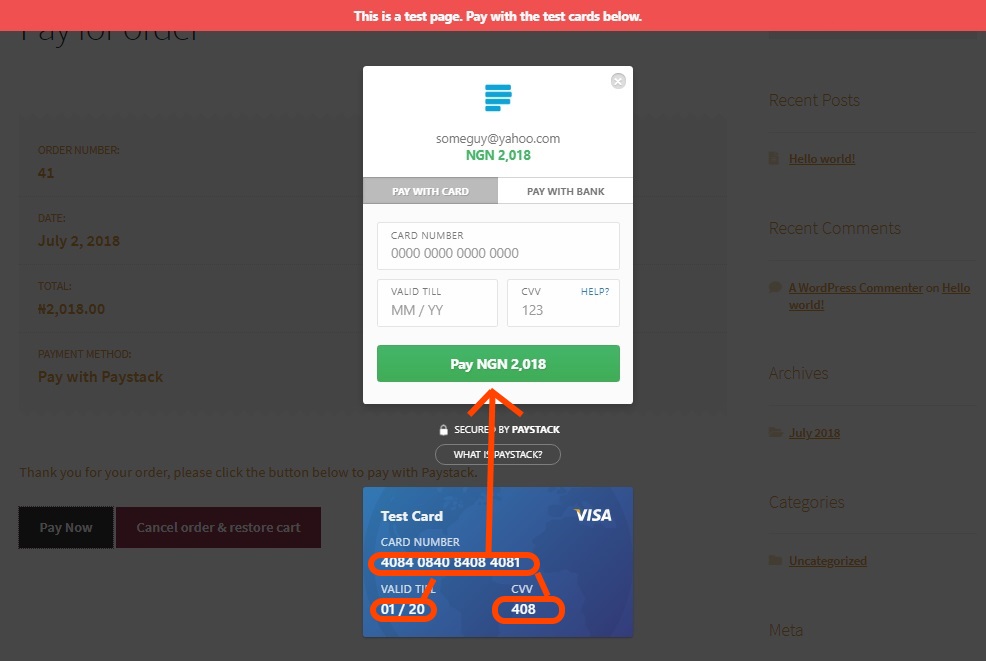
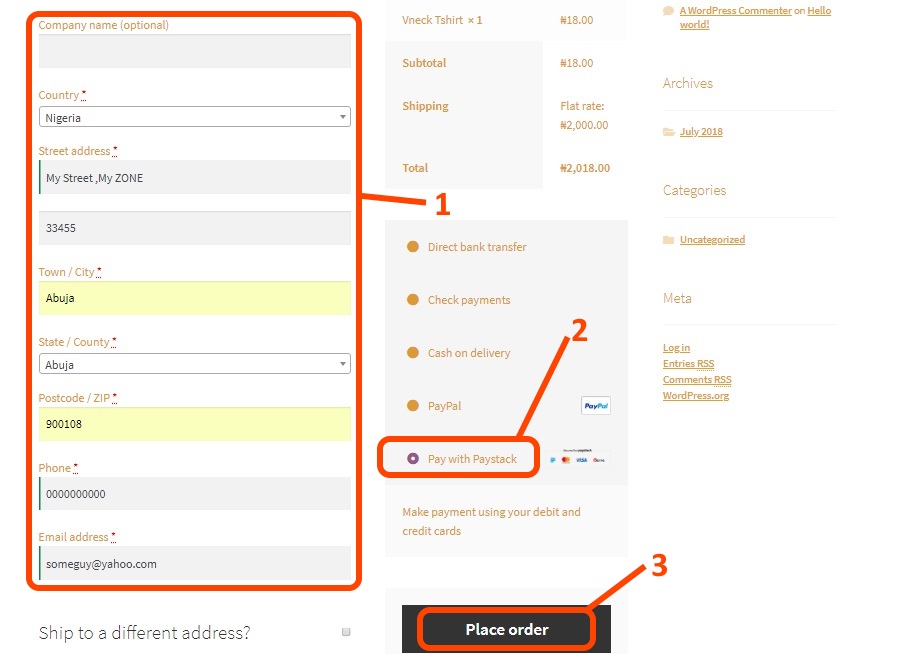
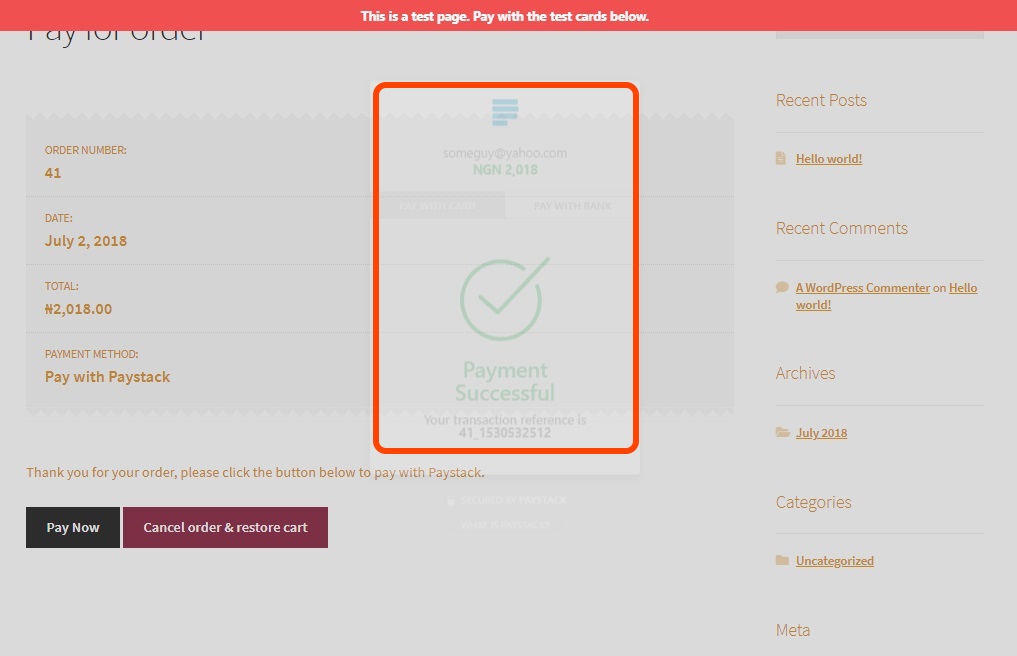
Due to we are using test mode, Paystack will provide a dummy card details for completion of payment.
Next: Auditing
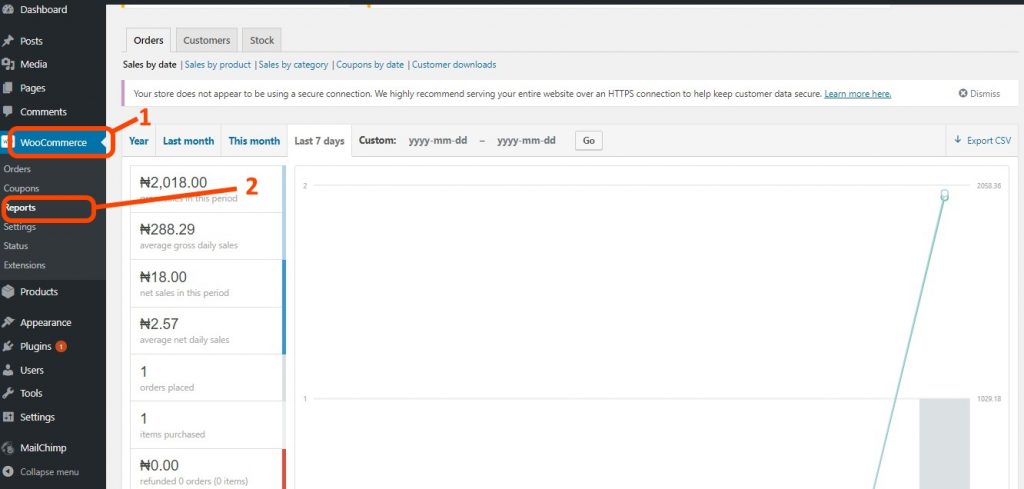
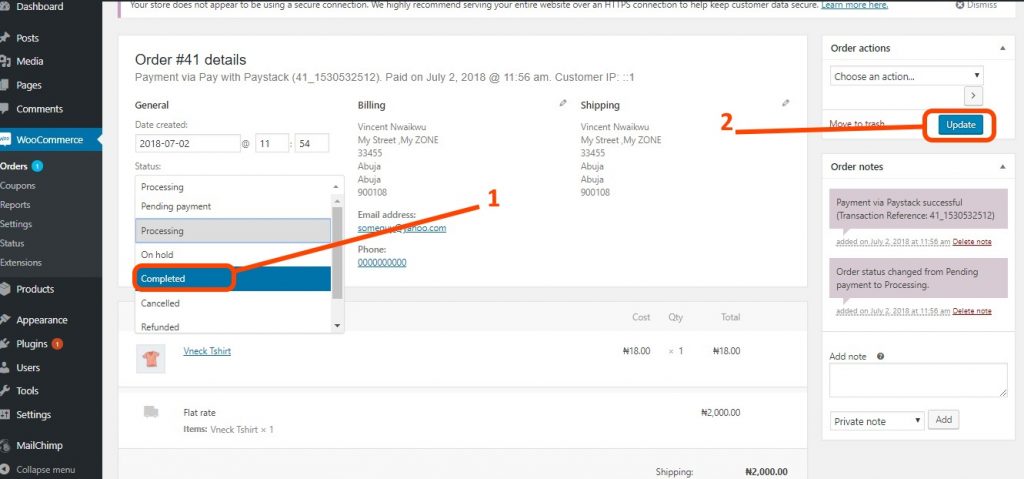
You can management and track orders directly by navigating to WooCommerce>>Orders or WooCommerce>>Reports.
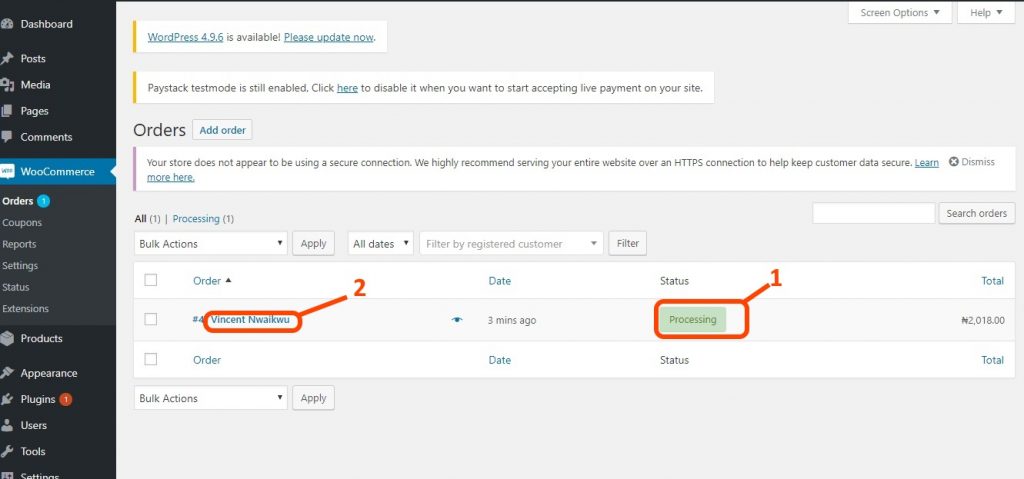
You can manage orders from WooCommerce>>Orders.
What is Next?
There are different kinds of products that can be sold via WooCommerce. There are also lots of plugins that work with WooCommerce as an extended plugin that it is. Coupons and discounted products can also be created with different shipping methods including third-party shipping handling and tracking as well.
With WooCommerce, you can also have a marketplace where different vendors can sell their products and services, while you manage the sales and transaction as the owner of the marketplace.
To learn more on how to do all these and more, enrol for a website design training with Soutech Web Consults where you would acquire specific skills and become a professional website designer.
Should you have challenges with setting up your e-Commerce website, contact us today for our professional services.
| Want to start an eBusiness and Grow it Globally with free IT, Legal, Internet Discounts,3 Months SME Startup Course, ePayment Integration, Biz Development Services, Free Website, Free SMS Units/Portal all done for you within 30 Days?
Start Here>> Click >>> Start a Digital Business in Nigeria
Related posts:
 Website Design Training: See this Amazing Corporate and e-Commerce Website Built by a Student.
 How to Get a Free Website, Mobile App and Payment Integration in 2019
 7 Categories of Website You Can Build With WordPress
 CMS Website Development: How to Install WordPress on Local Server
 Guide: How to Start and Maintain Your Own Website Design Business