- April 10, 2018
- Posted by: SouTech Team
- Category: Development, Website Design Service Abuja, Website Design Training, Website Hosting, Wordpress Website Design Training
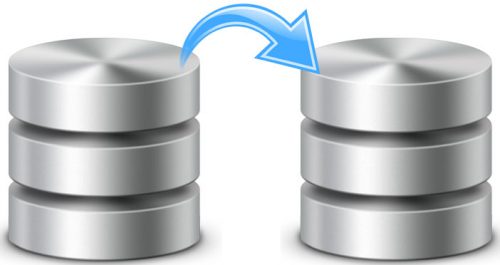
Lots of people have been calling and requesting thus: “please, can you help me to backup and restore my website, or tell me how to do it”? So I decided to write on how to backup and restore your website. This tutorial does not cover a new WordPress Installation. If you intend to install a fresh copy of WordPress, please read this article on how to install a Fresh WordPress in your Cpanel.
Method 1: Backup and Restore CMS Website – WordPress
If you are building a new WordPress website and want some contents of your already existing website to be added in your new website, then here are the steps you will need to take.
| Want to start an eBusiness and Grow it Globally with free IT, Legal, Internet Discounts,3 Months SME Startup Course, ePayment Integration, Biz Development Services, Free Website, Free SMS Units/Portal all done for you within 30 Days?
Start Here>> Click >>> Start a Digital Business in Nigeria
Step One – Updates
Login to your WordPress dashboard, and make sure all plugins are updated. It is very important to update plugins whenever there is an update released. Regardless of the fact that it is also a standard practice to counter vulnerabilities and other security issues, it will save some troubles if it happens that your new website has updated plugins.
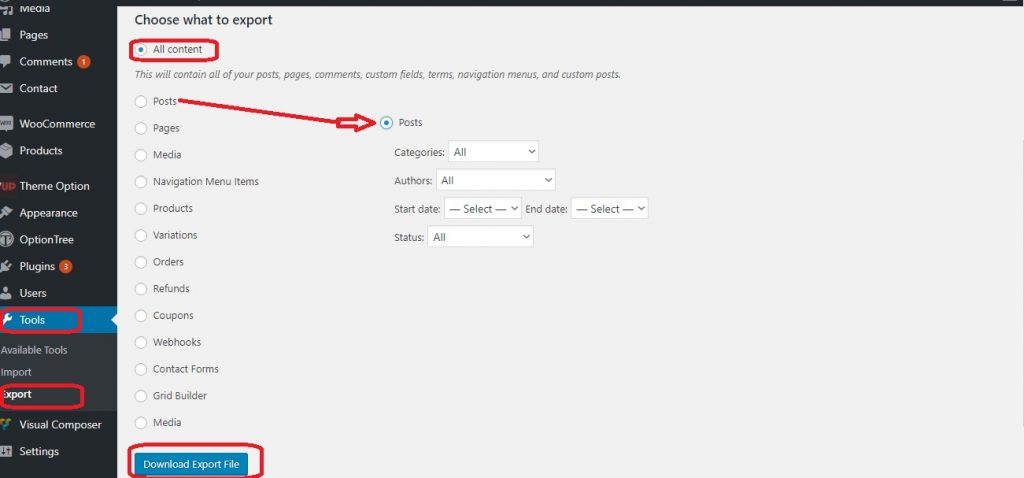
Step Two – Export
Navigate to Tools >> Export on your dashboard menu. By default, the “all content” button is already selected, so all you need to do is scroll down to where you will see the blue button “download export file”. However, if you wish to download specific backups such as only posts or pages, you will need to select the appropriate button and choose the categories, status and authors of the posts or pages you intend to download. You will also see an option to choose a date range. When you click on the “download export file” button, your content will be downloaded in an XML format.
Step three – Import
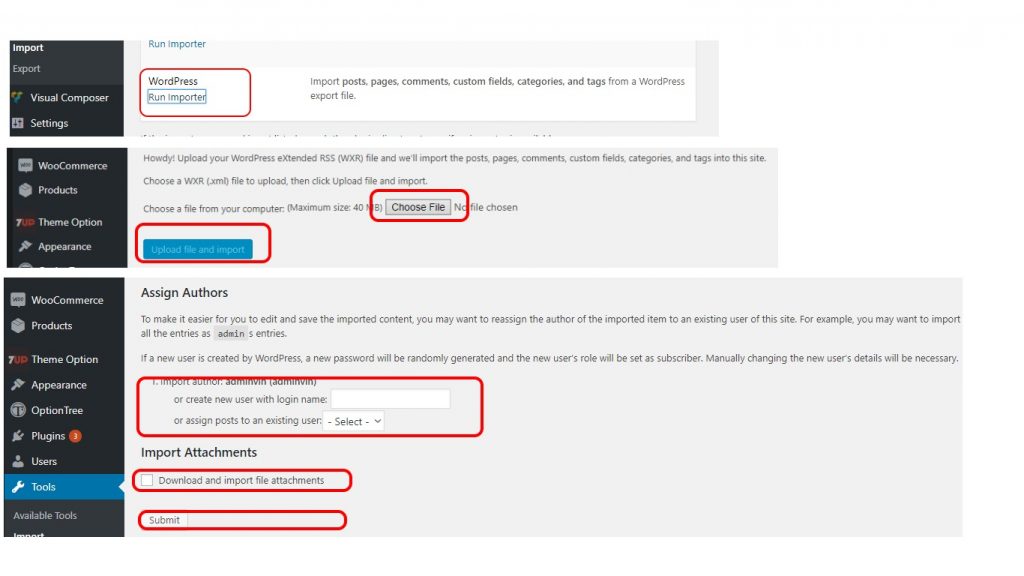
So you now have your backup in XML format saved somewhere in your computer. Log into the dashboard of the new website, make sure all plugins that require update are being updated. Navigate to Tools >> Import from the dashboard menu, you should see some list of tools, click “install now” on the WordPress import tool and then click run after it’s done installing.

Clicking the “choose file” button will pop a dialogue box, navigate to the folder where your XML backup file is, select it and click the “upload and import” button to start the import process. WordPress will require that you assigned a new user as the author of the post and pages or to choose from available existing users. If there are media files attached to your export file, WordPress will ask if you want to download and attach the media files or to upload the backup file without media files attachment, check appropriately and click the submit button.
Method 2: Backup And Restore Your Entire Website (Database and Web files) Via Cpanel
If you want to backup and restore an entire website, the method above will not be a recommended approach, however, you will need to have Cpanel credential in order to perform the following method.
Step one: Backup your website database
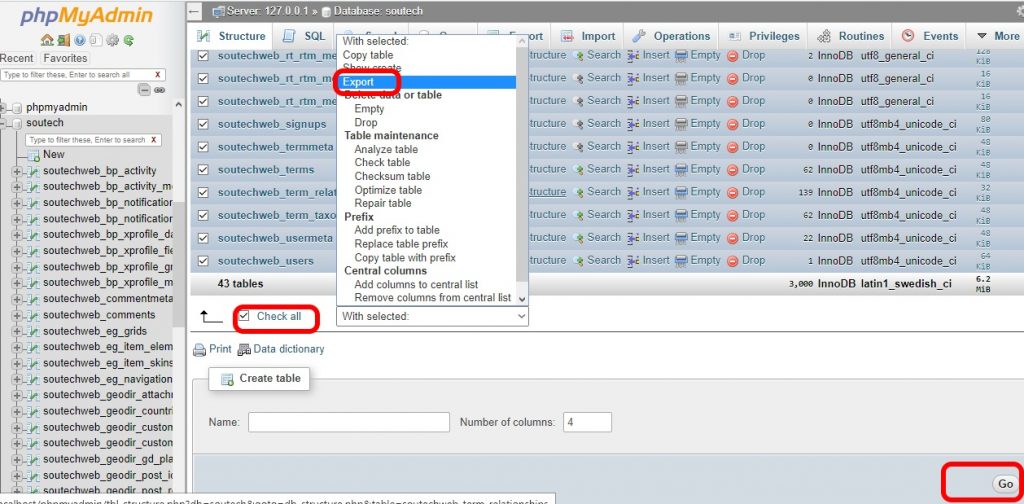
Login into your Cpanel, navigate to the databases section and click on PHPMyAdmin.
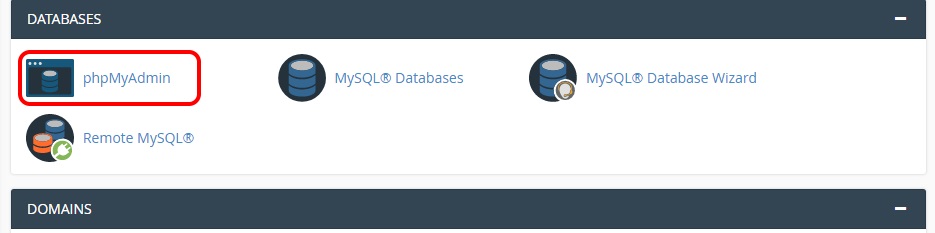
PHPMyAdmin is a database admiration interface used for managing MySQL or MariaDB. Once in there, look for and select the database of the website you want to backup.
(It is sometimes confusing when people try to export their database especially when they have more than one database with names such as wp082. Wp083. To avoid this while setting up your new WordPress, please follow the guide on “How to install WordPress via Cpanel”). After selecting the data, check all table in the database, and choose the export option from the list of option for action. Leave everything as it is and click the “go” button to start downloading the backup. The file will be download into your computer with a “.sql” extension.
Step 3 Backup your website files
In your Cpanel, navigate to Files Manager in the Files section, locate and select all files and folder inside the “public_HTML” folder and choose “compress” from the file manager menu, choose an extension you want to compress them into, preferably .zip extension.
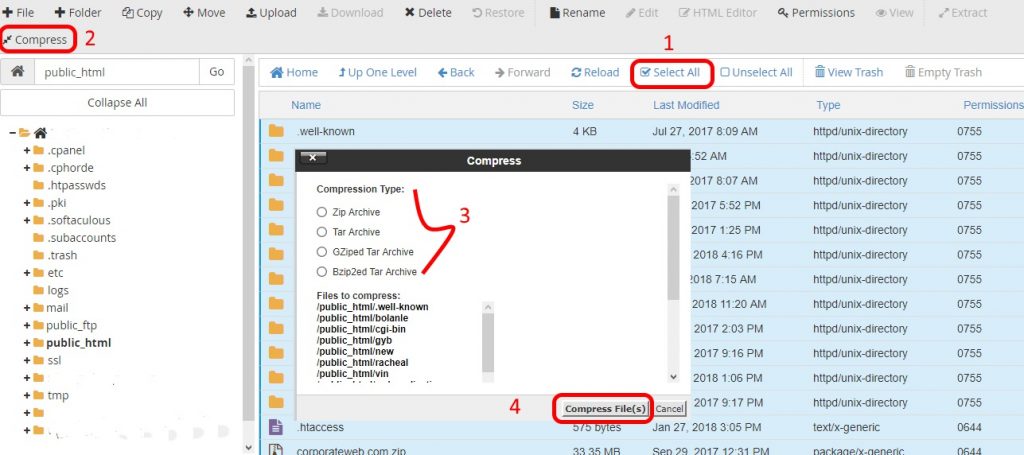
A new .zip file will be created inside your “Public_HTML” folder, double-click the file to download or select the file and click download from the file manager menu. You should have your file downloaded on your computer.
Step 4: Modifying the .sql backup file
Now that you have your database SQL file downloaded, it is time to modify the downloaded file before importing into the new database. Open or edit the downloaded file using a text editor, preferable notepad++. The first thing is to find and replace all former domain to the recent domain if there are differences. You will then need to find and replace the table prefix if you intend using a different table prefix from the former. Save the modified .sql file.
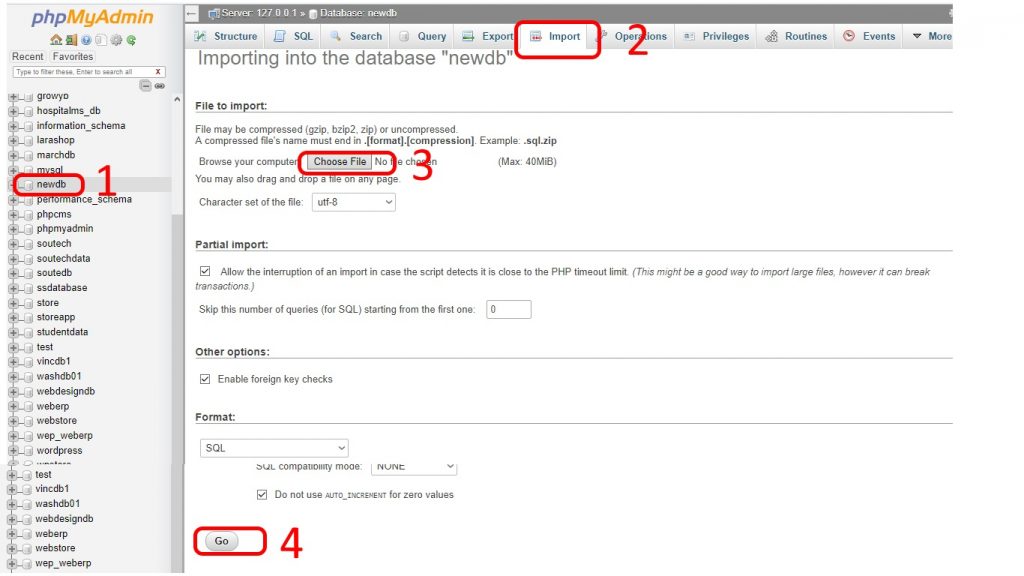
Step 5: Importing the database backup
Login to your Cpanel and create a new database using the database wizard, choose desirable username and password.
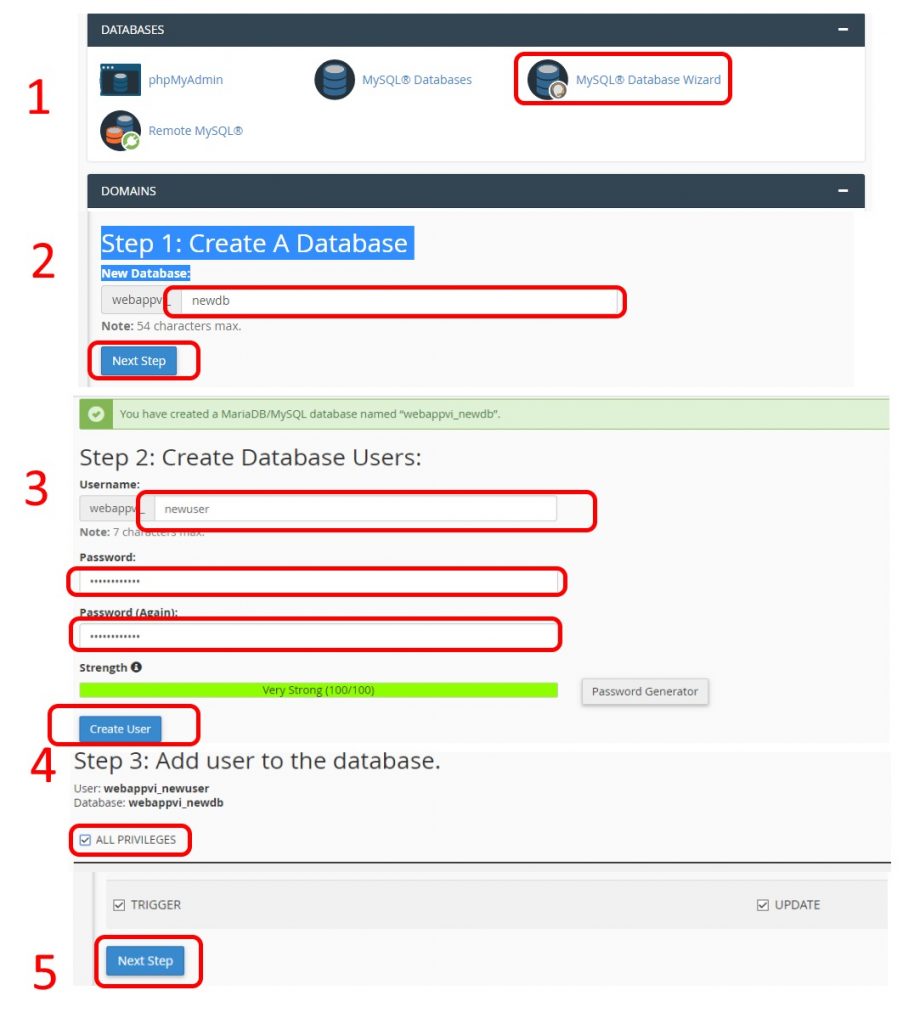
The database should be blank without tables in it. Select the database from the list of databases, navigate to the import tab on your PhpMyAdmin, click the “choose file” button and use the dialogue box to locate the backup file, select to upload it and scroll down to click the go button. The backup database will then be imported into the new database.
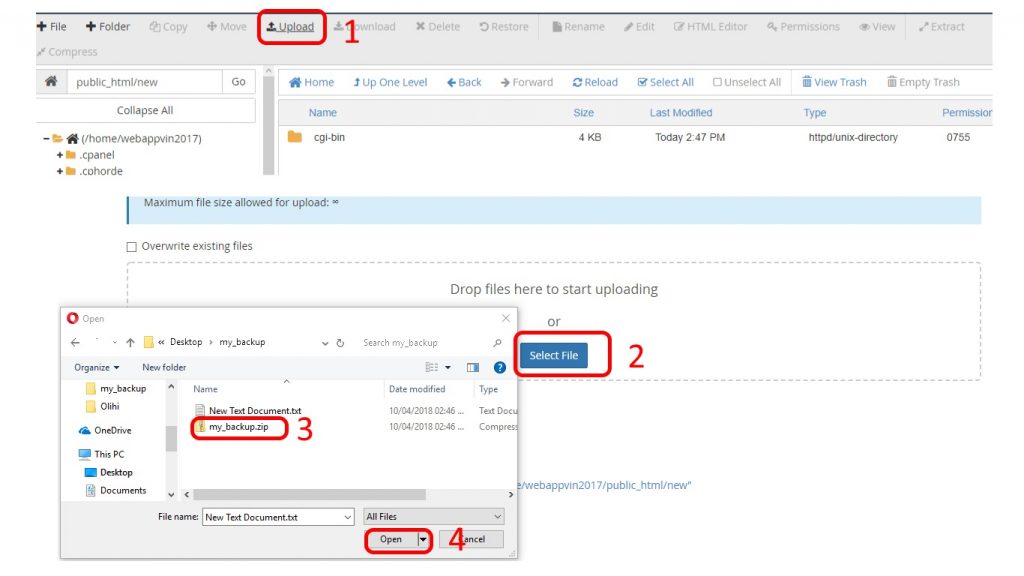
Step 6: Restoring your website files
In your Cpanel navigate to File Manager >> Public_HTML click the “upload” tab from the file manager menu. Drag and drop the downloaded zip file to initiate the upload process.
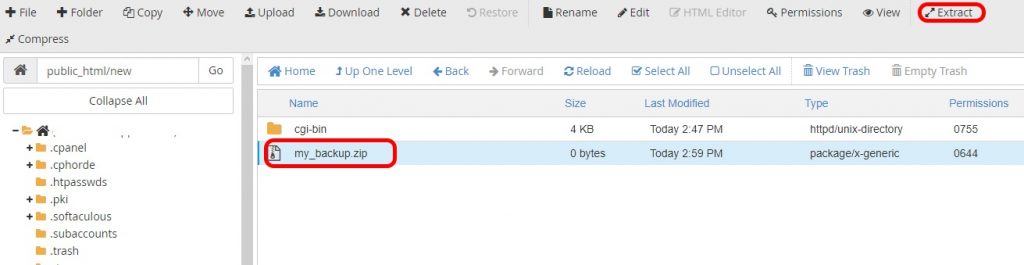
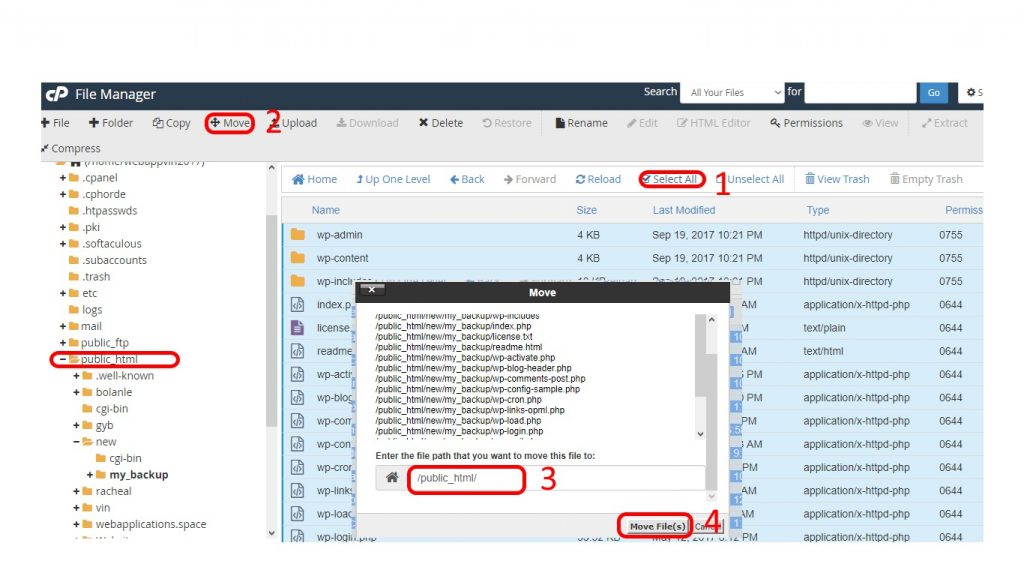
Once the zip file is done uploading, select the zip file and click extract from the “file manager tab”. Move all extracted files and folders into the “public_html” folder, you are done.
Method 3: Backup entire website for migration (Databases, Web files, Subdomain Emails)
If you intend to backup your enter website, including databases, subdomains, web files, emails for migration, the best way to do such is to use the Cpanel backup. However, this procedure will require some good knowledge of Cpanel administration as regards DNS. Soutech Web Consults has been handling website migration for over 10 years and will serve as a perfect solution for you in this regard.
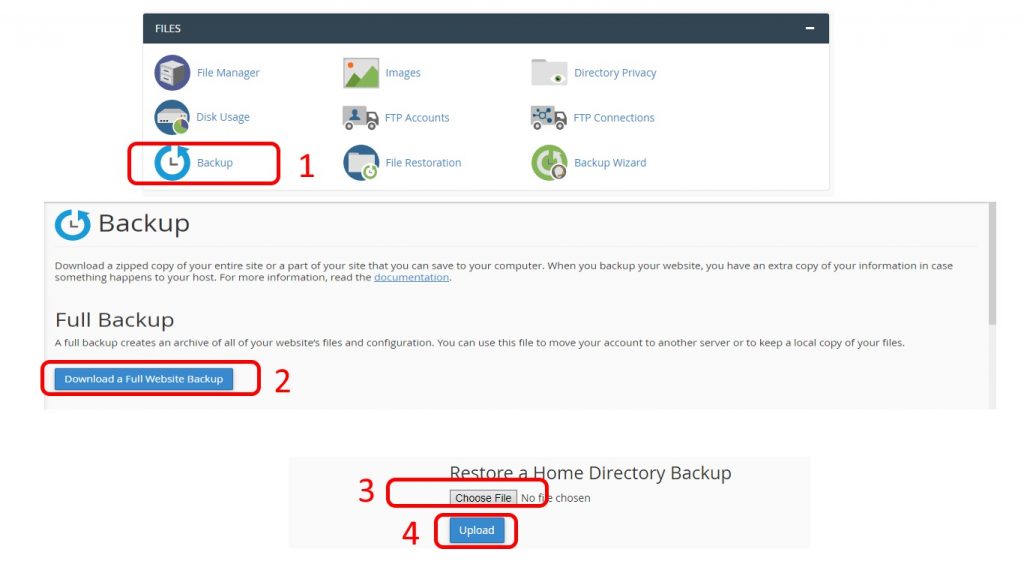
- Click Backup in Files section of your Cpanel.
- Click “download a full website backup” to generate a backup of your website. This action will generate a full backup saved as a zip file inside your website home directory. You will be required to download this zip file to your computer before uploading into the new website.
- On your new website’s Cpanel, Files >> Backup >> click “choose file” under “Restore a Home Directory Backup” locate and select the downloaded backup file on your computer, and click upload, this will upload your backup website into the new Cpanel.
Method 4: Backup and restore using a WordPress plugin (Alternative)
Alternatively, there are some useful plugins that can be a solution for website backup, restore and even migration.
One of those plugins is WordPress backup by Backup Guard. To use this method, you will have to install a backup plugin some plugins can backup but cannot restore. We will be using the backup by backup Guard plugin in this tutorial. The plugin has a silver version for $19.95, but we will be just fine using the free version of the plugin.
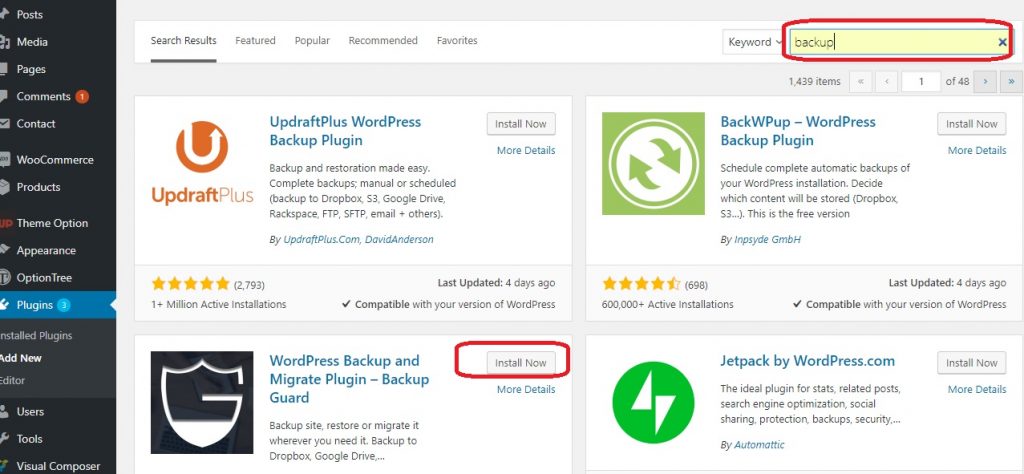
- From dashboard menu navigate to Plugins >> Add New and search for “backup” locate and install WordPress back and Migrate Plugin by Backup Gaurd. Activate the installed plugin and continue to step 2.
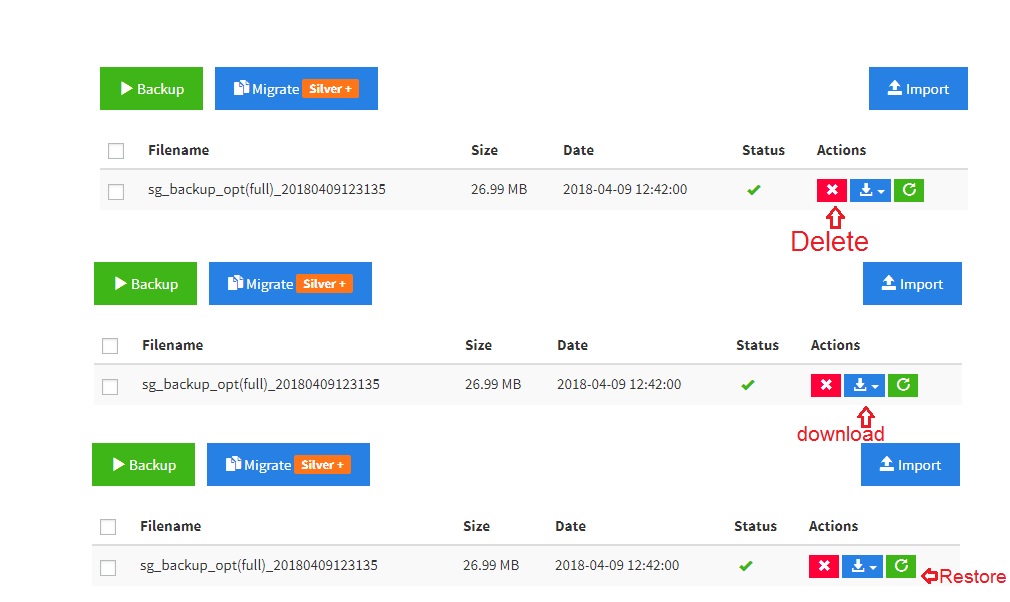
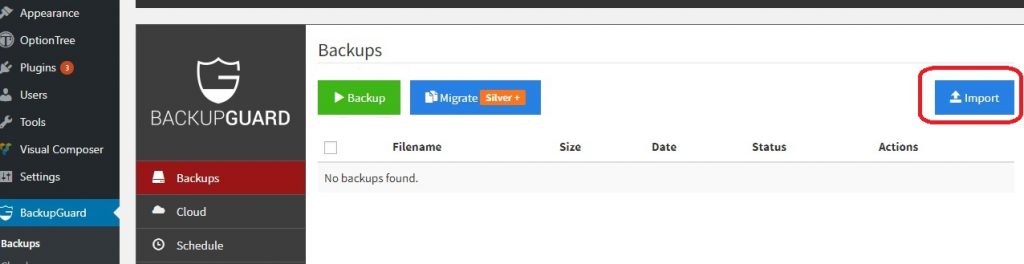
- From dashboard menu, navigate to BackupGaurd >> Backups
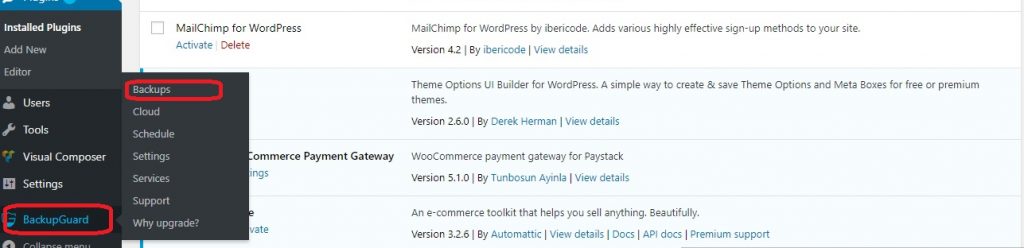
- Click on backup in the plugin interface.

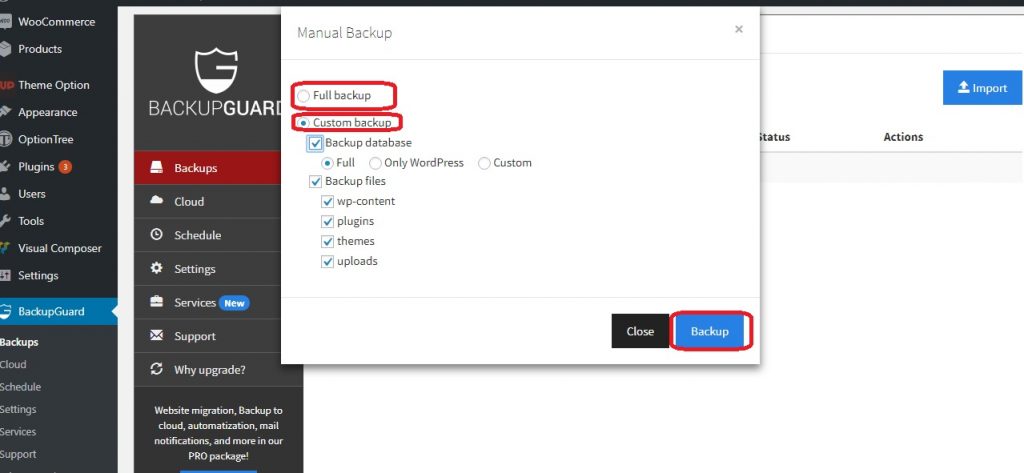
- Select your desired backup option and click the backup button.
- After a successful backup, you should see your backup file with some actions on what to do with it.
Restoring Backup to a new WordPress Website.
- Install and activate the plugin by following steps above.
- Select Import from the plugin interface and upload the downloaded backup.
Website backup and restore are an enormous, yet painstaking tasks. Somethings could go wrong if backup or restore is not properly done. In such challenges, Soutech Web Consult is always happy to help you in your website backup, restore and migrations.
Want to become a Web Development Expert TODAY?
Enrol Now >>
Website Development Training in Nigeria
| Want to start an eBusiness and Grow it Globally with free IT, Legal, Internet Discounts,3 Months SME Startup Course, ePayment Integration, Biz Development Services, Free Website, Free SMS Units/Portal all done for you within 30 Days?
Start Here>> Click >>> Start a Digital Business in Nigeria
Recent News
- Document Sharing Traffic Secrets: How to Get Huge Backlinks and Leads for your website
- Huge Traffic and Lead Generation Secrets: Content Marketing Strategy for SMEs
- Top 10 Worlds Popular Software that uses Python Programming Language
- 10 Basic Python Examples That Will Help You Learn Fast
- Getting to Learn Python: Beginner to Advance Guide Approach
- Python for Beginners: Learning Python Programming Language Fast